Prerequisite :
WSO2 Micro Integrator 4.0.0
WSO2 Integration Studio 8.0.0
WSO2 API Manager 4.0.0
Use Case:
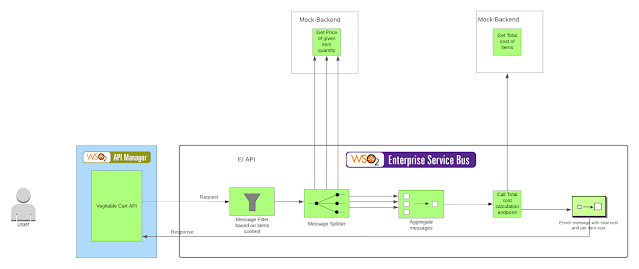
Veggies Cart, an online Vegetable cart, is going to be soon established. The customers can buy vegetables through a website that calls a secured API. Customers may send empty or non-empty vegetable lists. If a customer sends a request with the body of an empty item, they will get a message. Otherwise, all the items in the request body are sent separately to the Item price calculation endpoint, to calculate the price of each item. After that, the total price calculation endpoint is executed to get total Items cost with delivery cost as well. Finally, the customer gets a response with each item cost as well as the total cost with the delivery cost.
High-Level Steps:
Create two Mock Services through Mocky.io which can return responses.
Create an Integration Project and add two Endpoints, an API, and four sequences through Integration Studio
Add Configuration for Fetch and Log the Message from Backend in Integration Studio
Deploy the Solution to In-Built Micro Integrator of Integration Studio
Implement the secured API in WSO2 API Manager
Test with Postman API call
Implementation
Start Integration Studio.
Create an integration project.
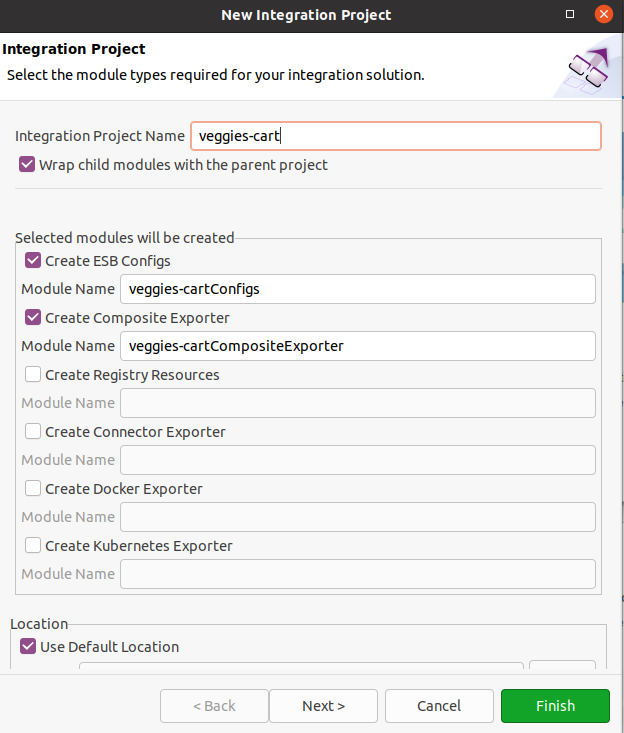
Click next.
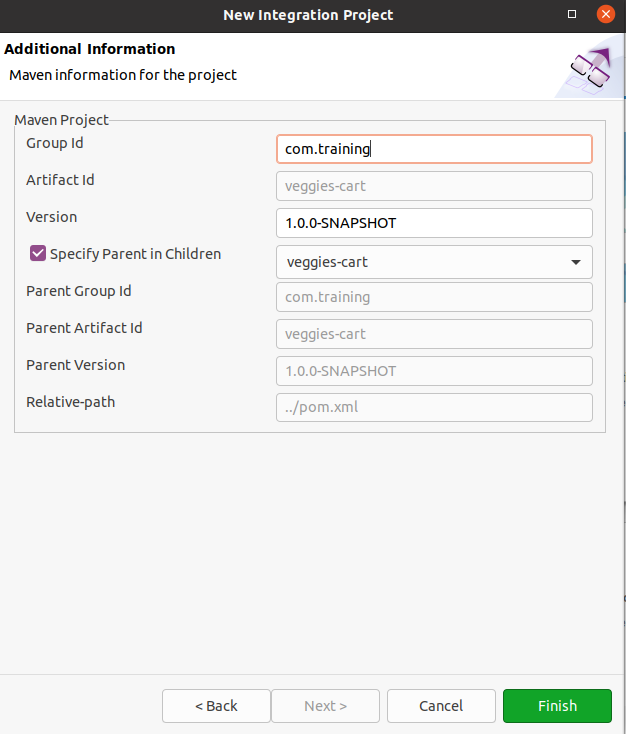
Click Finish.
3. Create a Mock Backend Endpoint to calculate the item price.
a. Go to https://designer.mocky.io/ and create two mock back-end APIs like the below payloads.
i. Sample payload to calculate item price.
{
"ItemId":"BB01",
"Price":500
}
ii. Sample payload to get the total amount
{
"BillId" : "10000102",
"Amount" : 850,
"DeliveryCost" : 100,
"GrossAmount" : 950
}
4. Configure the Mock backend Endpoints in Integration Studio.
i.Item Price calculation endpoint
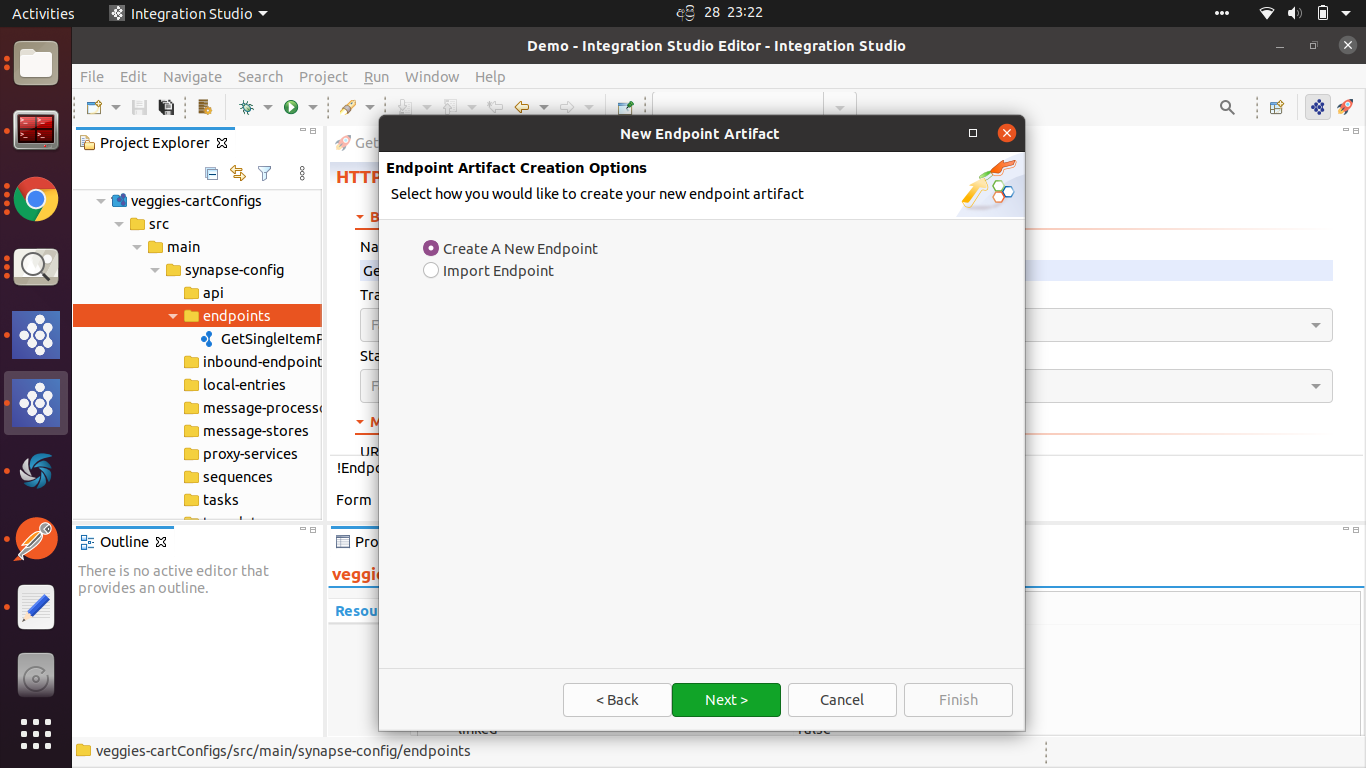
Right Click on the endpoints - > New -> Endpoints and follow the below screens.


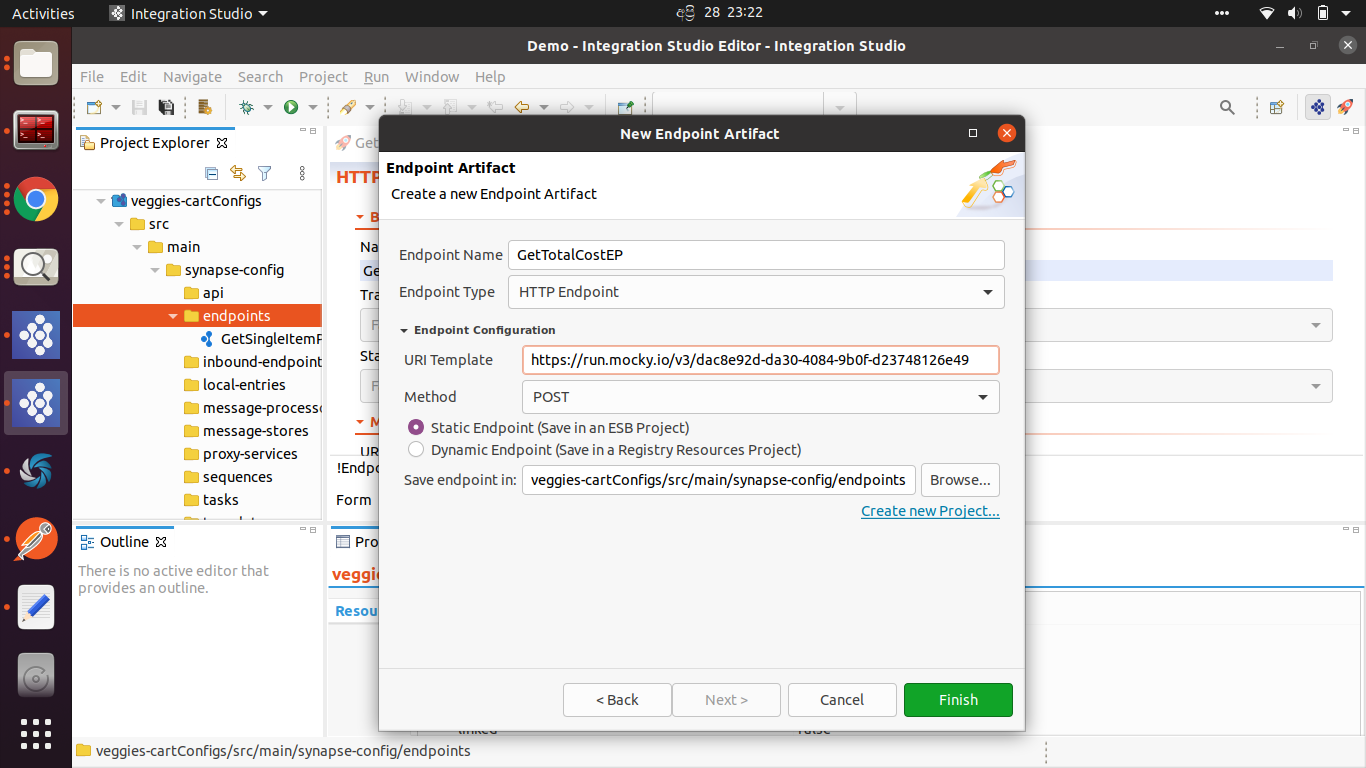
ii. Total Price calculation endpoint
Right Click on the endpoints - > New -> Endpoints and follow the below screens.
5. Create the sequences in the integration studio
Here 4 Sequences are required for the flow.
EmptyRequestSeq - Creating a message when the cart is empty.
GetSingleItemCostSeq - Get the price of each and every item for the given quantity
GetAllItemsCostSeq - Get the price list of the items on the cart.
GetTotalCostSeq - Calculate the total cost of the cart with the delivery cost
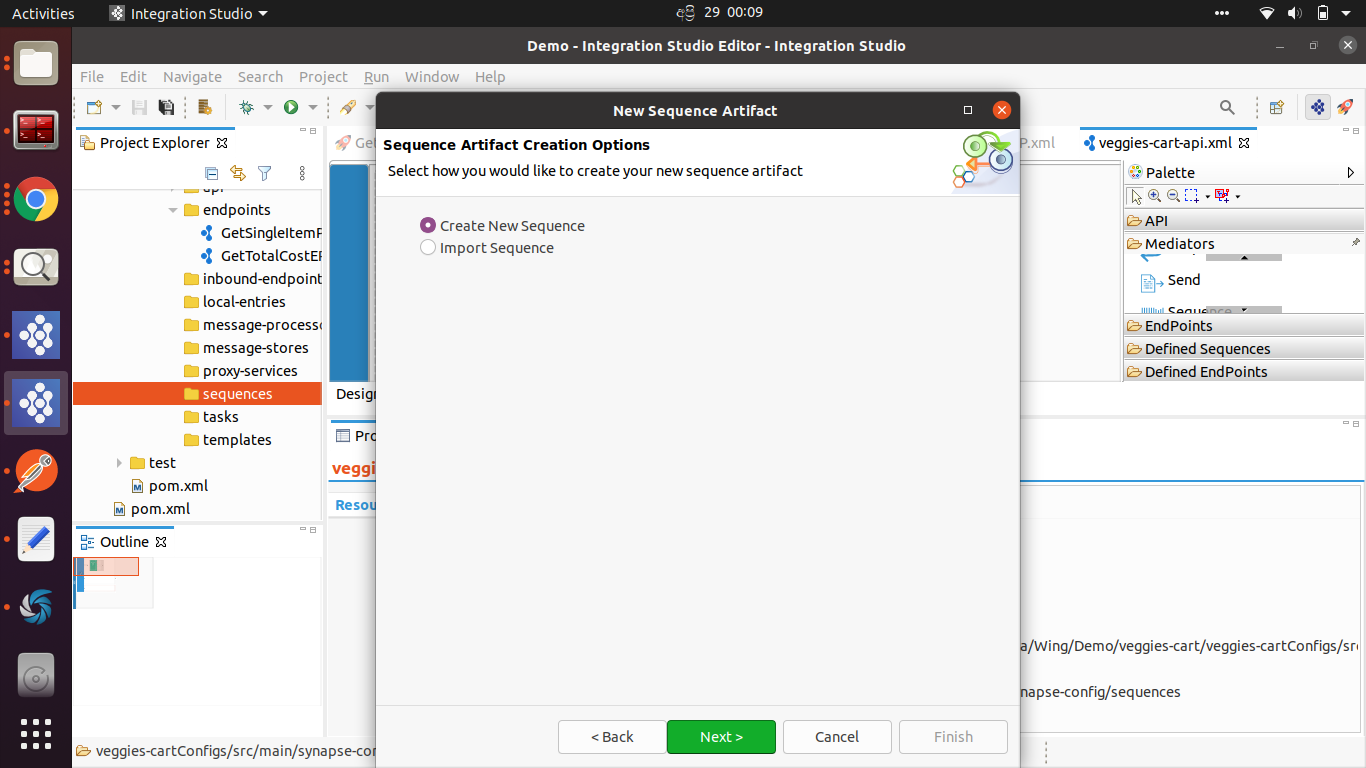
Right Click on the sequences - > New -> Sequences and follow the below screens.
Add the relevant sequence name in below window.

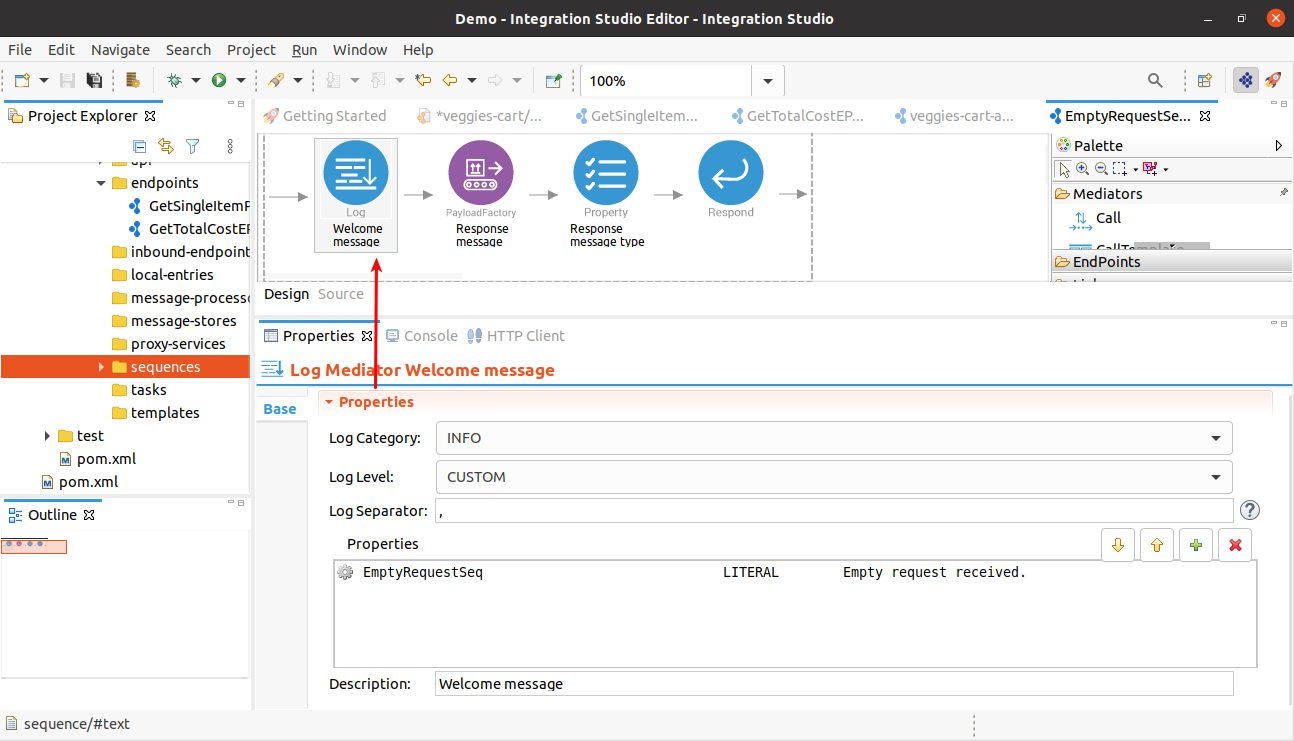
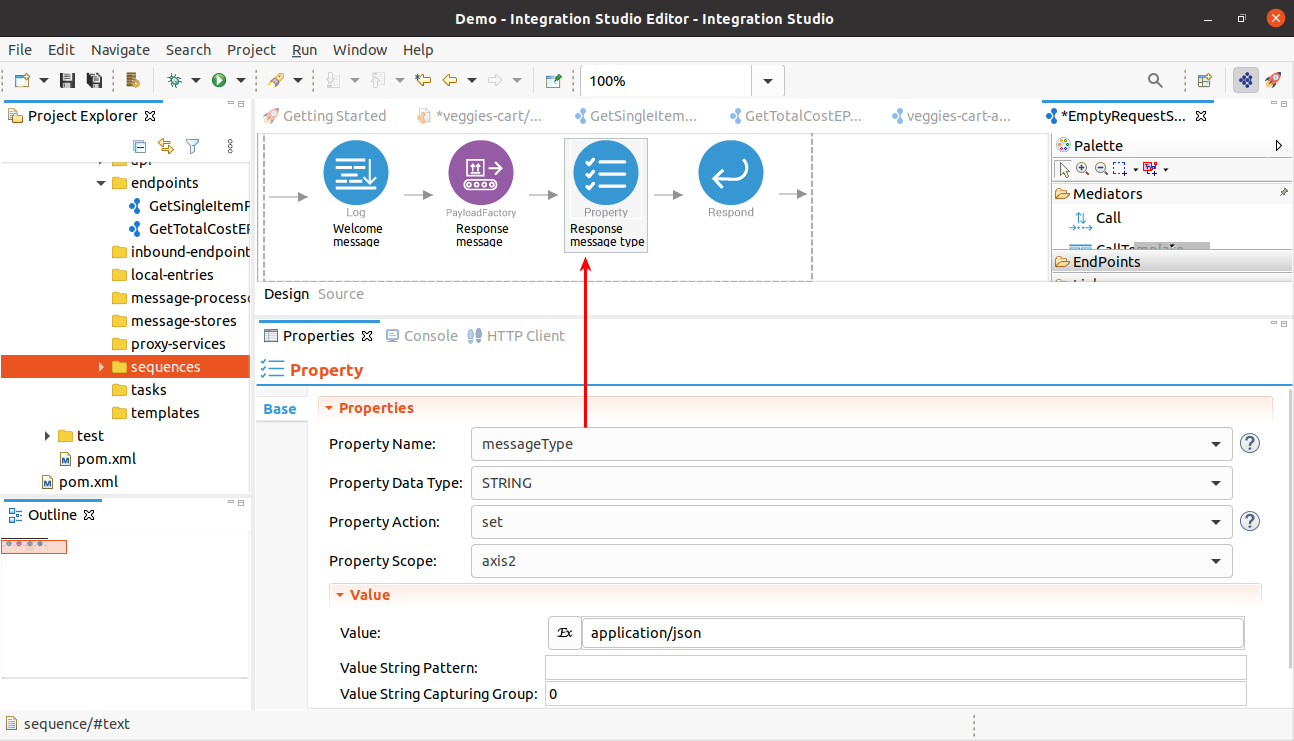
i. EmptyRequestSeq
Using the Drag and Drop option add Log, payloadFactory, property and respond mediators to the Integration Flow.
Log Mediator - To add a custom log saying that EmptyRequestSeq triggered.
payloadFactory mediator - To create the response message
Property mediator - To set messageType to the response message.
Respond mediator - end back the response to the calling party ( client ).
Log Mediator
payloadFactory mediator
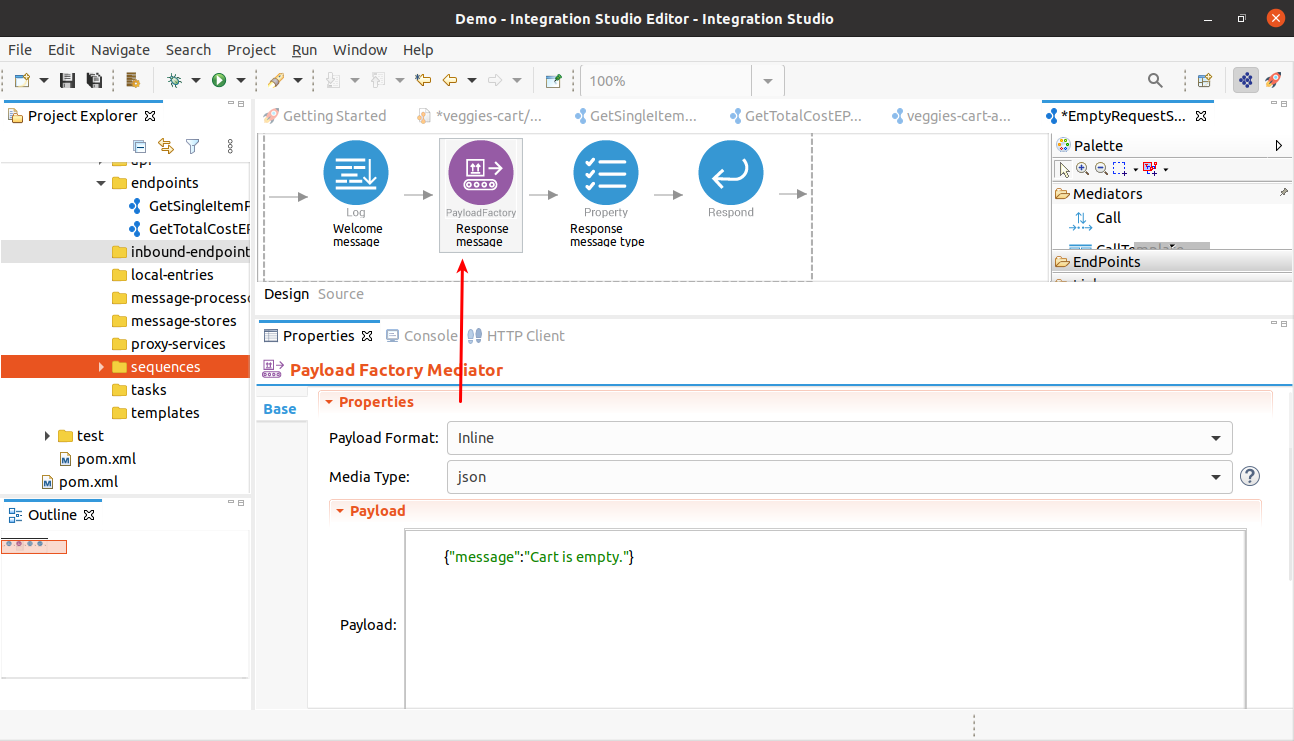
Property mediator
Respond mediator
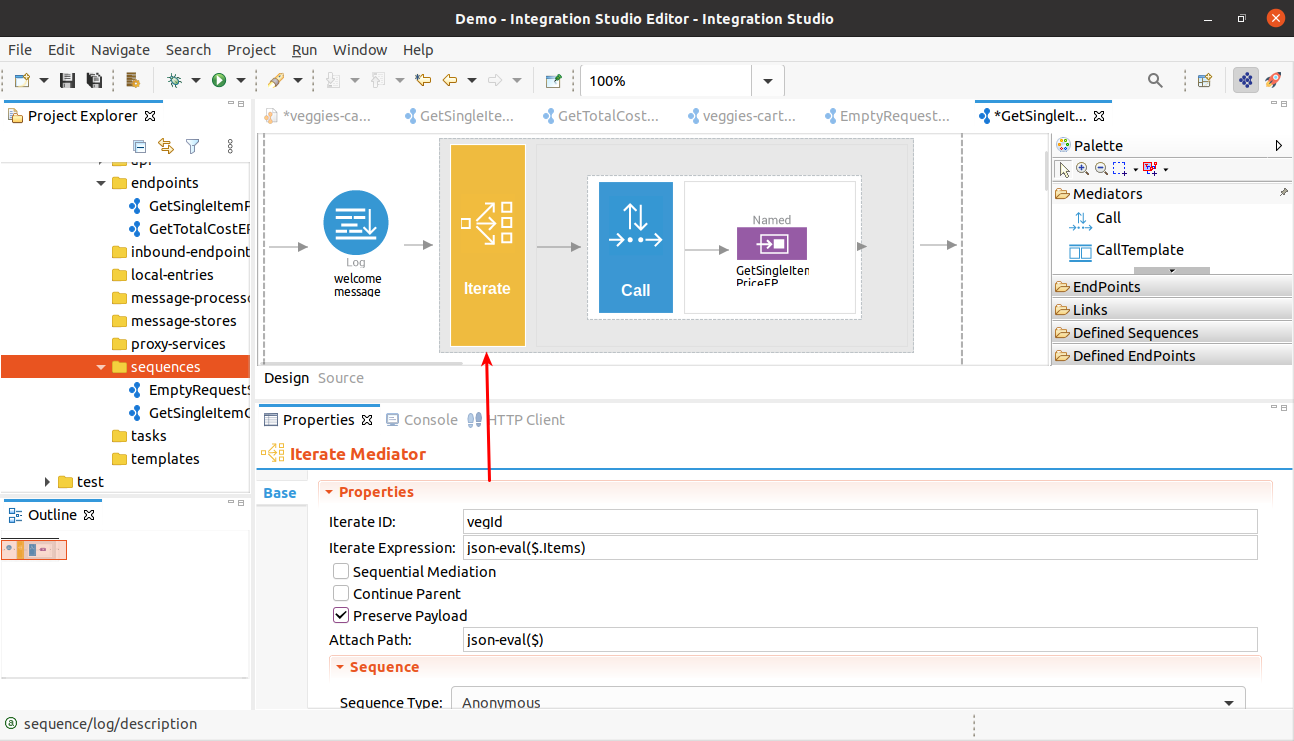
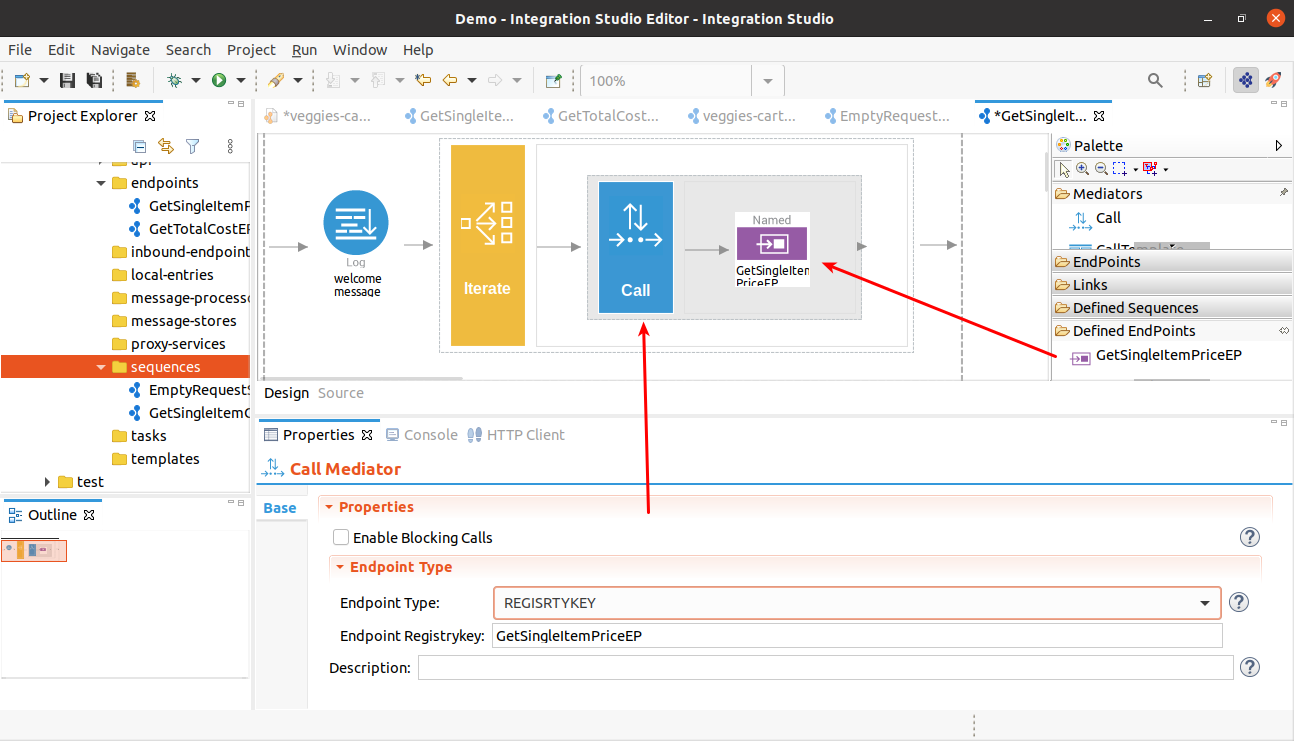
ii.GetSingleItemCostSeq
Log mediator, Iterate mediator, call mediator are used in this sequence.
Log mediator - To Log a custom message saying that GetSingleItemCostSeq is triggered.
Iterate mediator - To split the items in the shopping cart and get the prices.
Call mediator - To call the external endpoint.

Log Mediator

Iterate Mediator
Call Mediator
iii.GetAllItemsCostSeq
Log mediator, property mediator and aggregate mediator are used in this sequence.
Log mediator - To Log a custom message saying that GetAllItemsCostSeq is triggered.
property mediator - To create a root tag for the aggregated message.
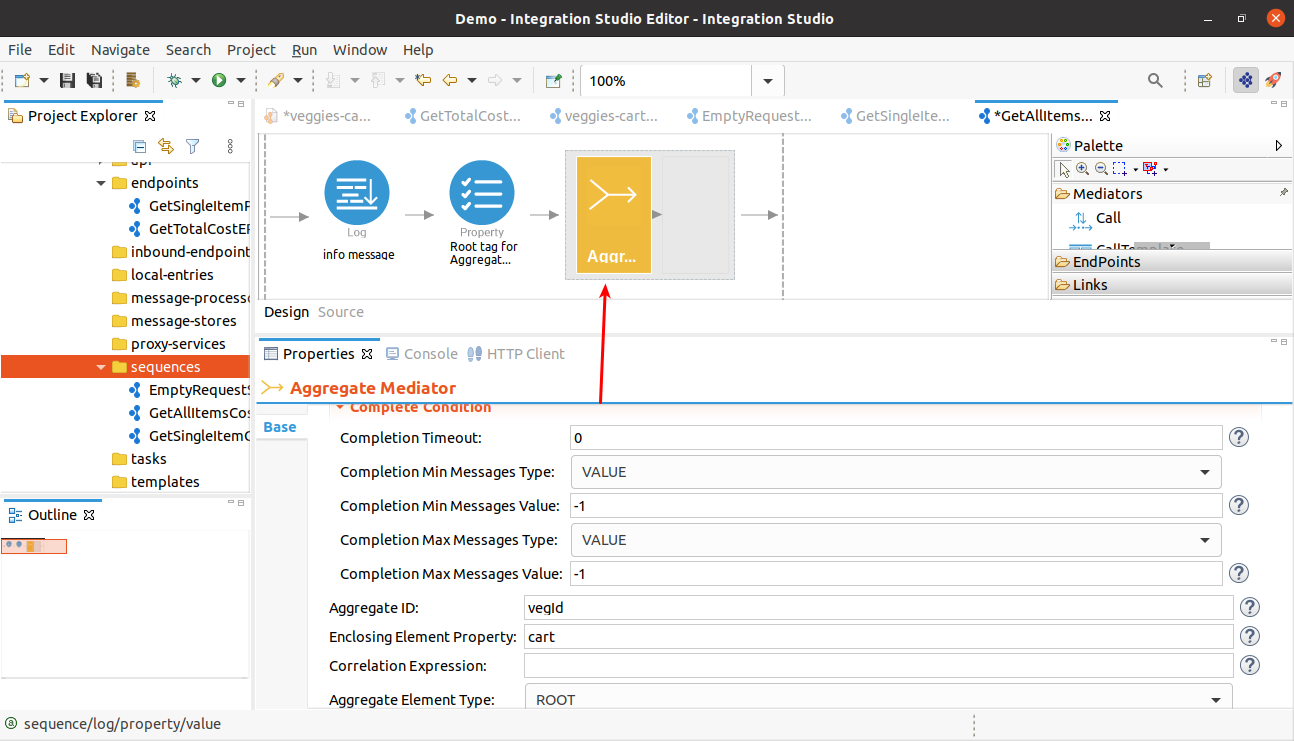
Aggregate mediator - To aggregate items with prices into a single message.
Log Mediator
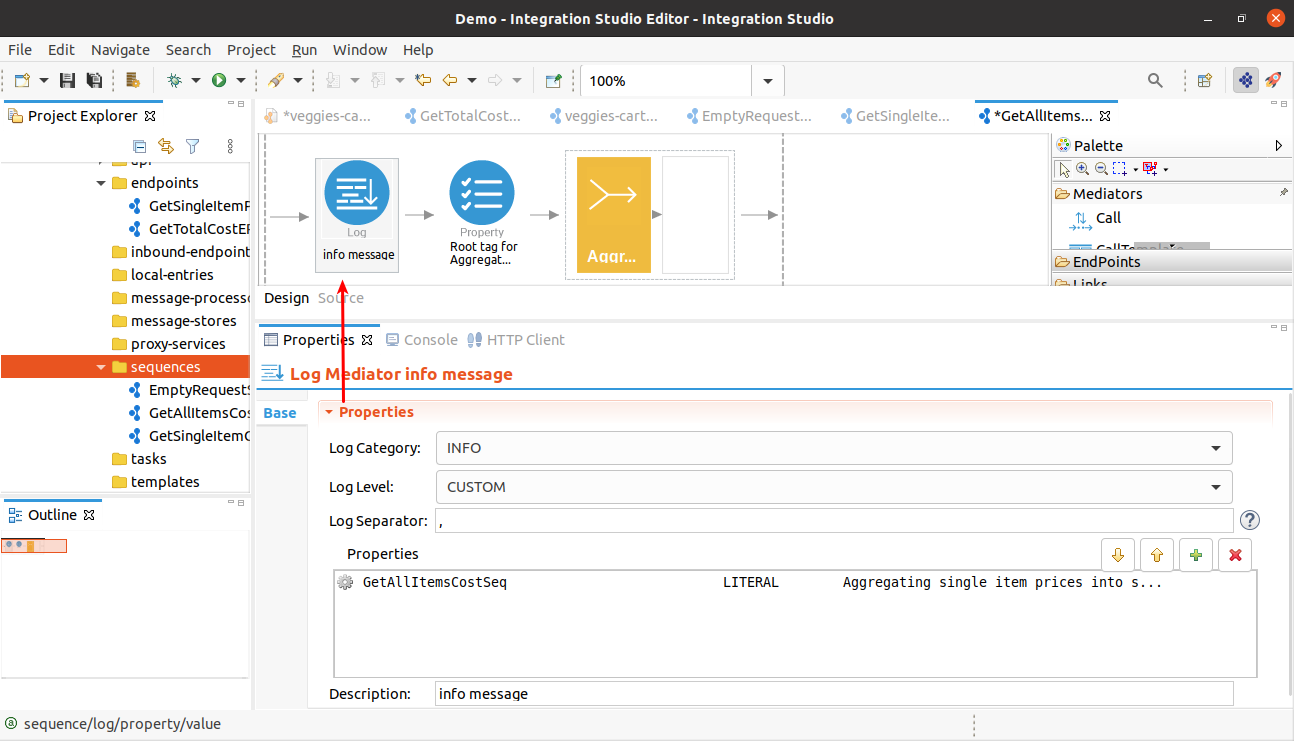
Property Mediator

Aggregate Mediator
Fill the properties of the aggregator like below. Here, Enclosing element property value should be the one recently created property name.
Note : The sequence in SequenceKey will be created as the next sequence.

iv. GetTotalCostSeq
Log mediator, PayloadFactory mediator and aggregate mediator are used in this sequence.
Log mediator - To Log a custom message saying that GetTotalCostSeq is triggered.
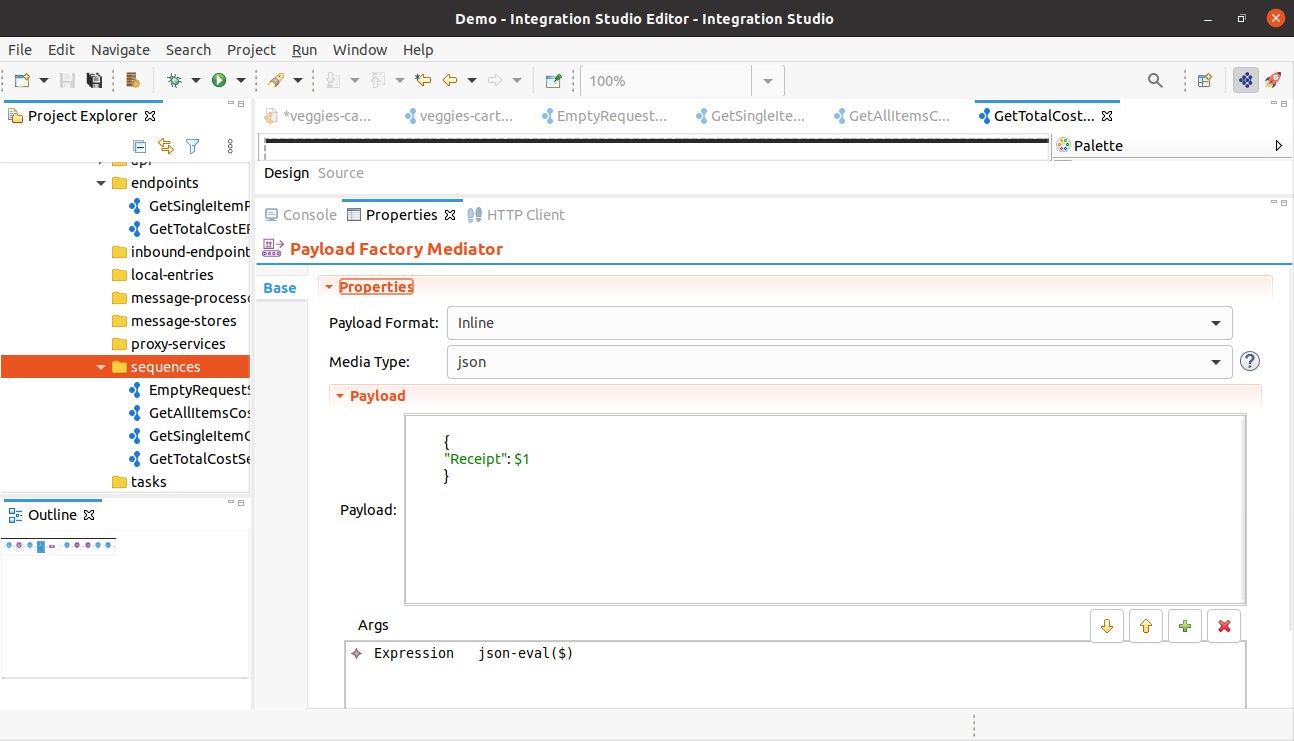
PayloadFactory mediator - To add a root element to the aggregated message.
property mediator - To get the context message (Let’s assume it is message01)
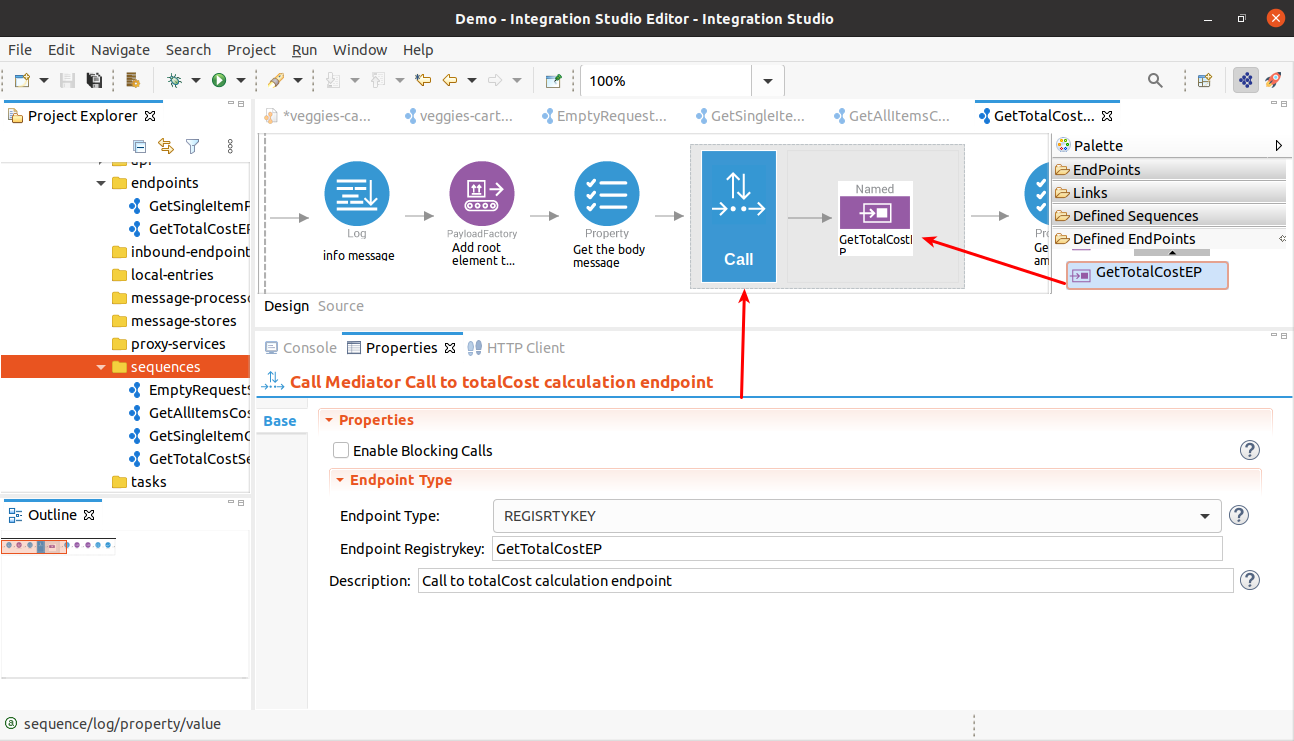
Call mediator - To call the external endpoint.
property mediator - To get the current context message which responded from the above call mediator. (Let’s assume it is message02)
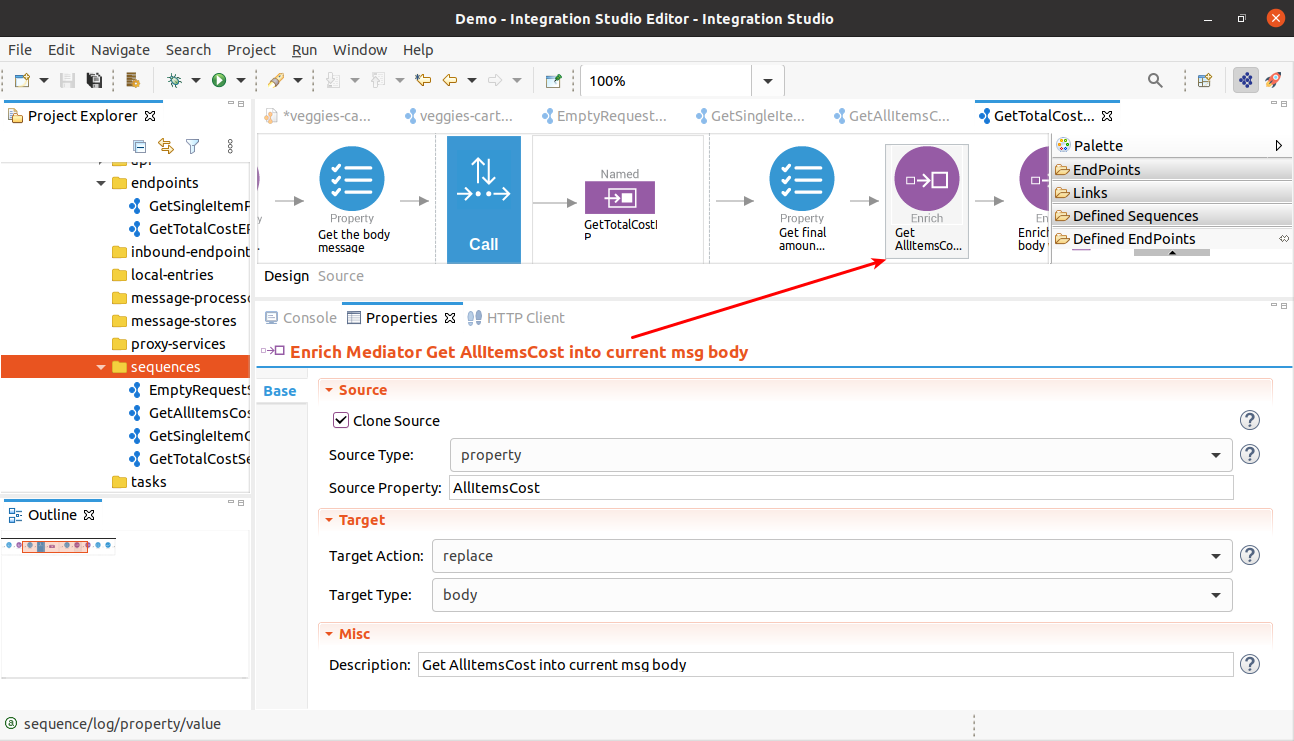
Enrich mediator - To set the message01 to the body.
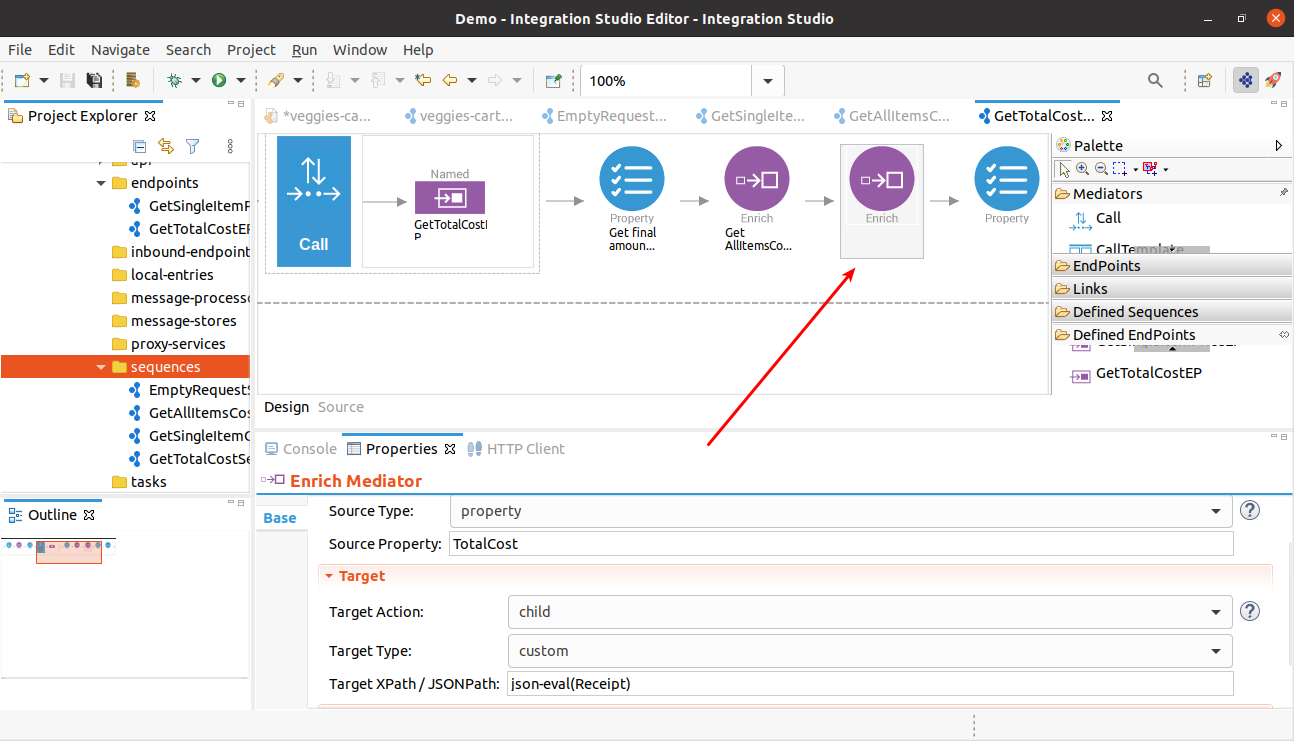
Enrich mediator - To enrich message 02 into message 01.
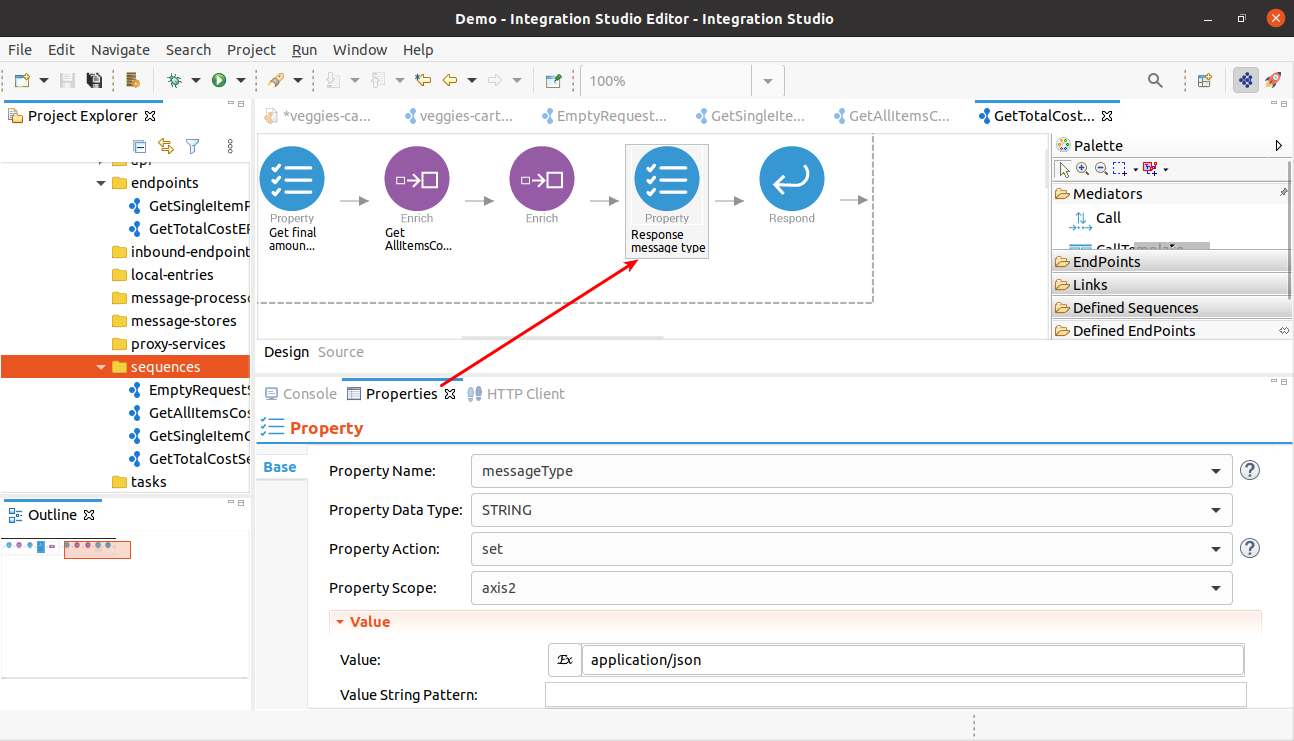
Property mediator - To set message type to the response
Respond mediator - Send back the response to the calling party ( client ).
Log Mediator
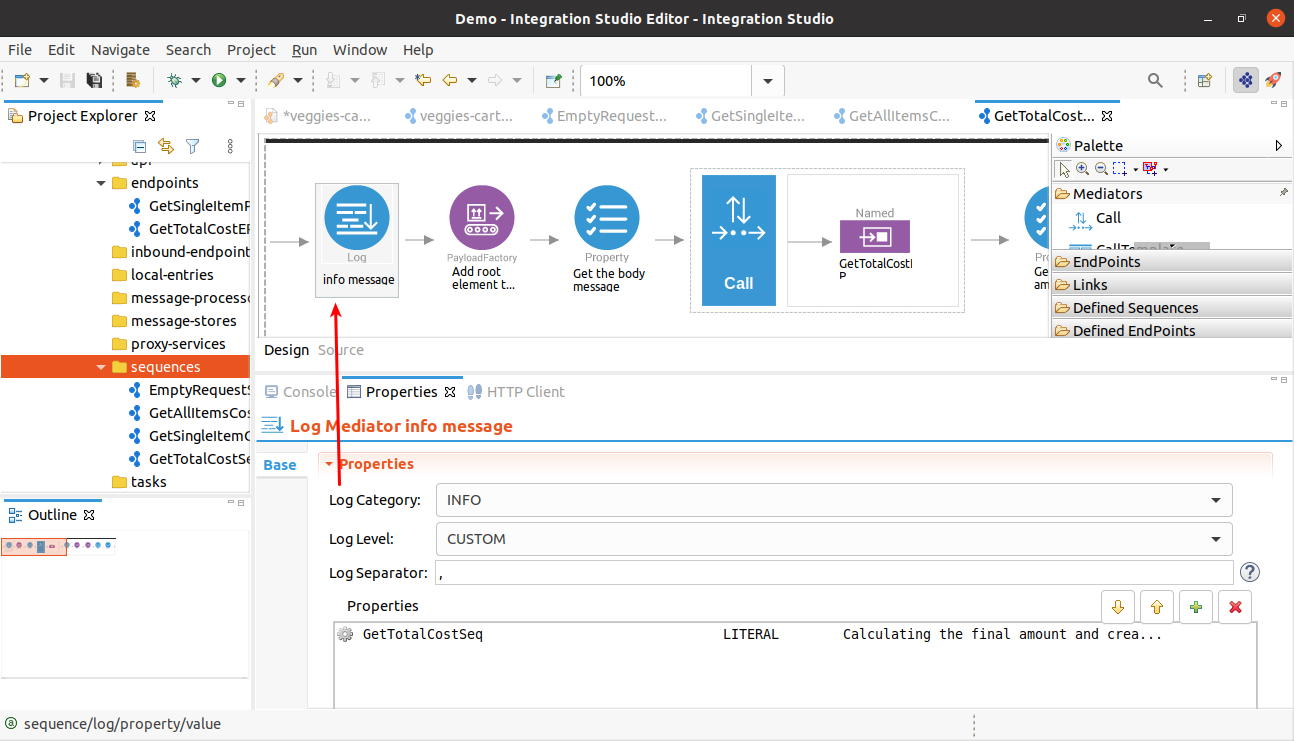
PayloadFactory Mediator

Property Mediator

Call Mediator
Property Mediator

Enrich Mediator
Enrich Mediator
Property Mediator
Response Mediator

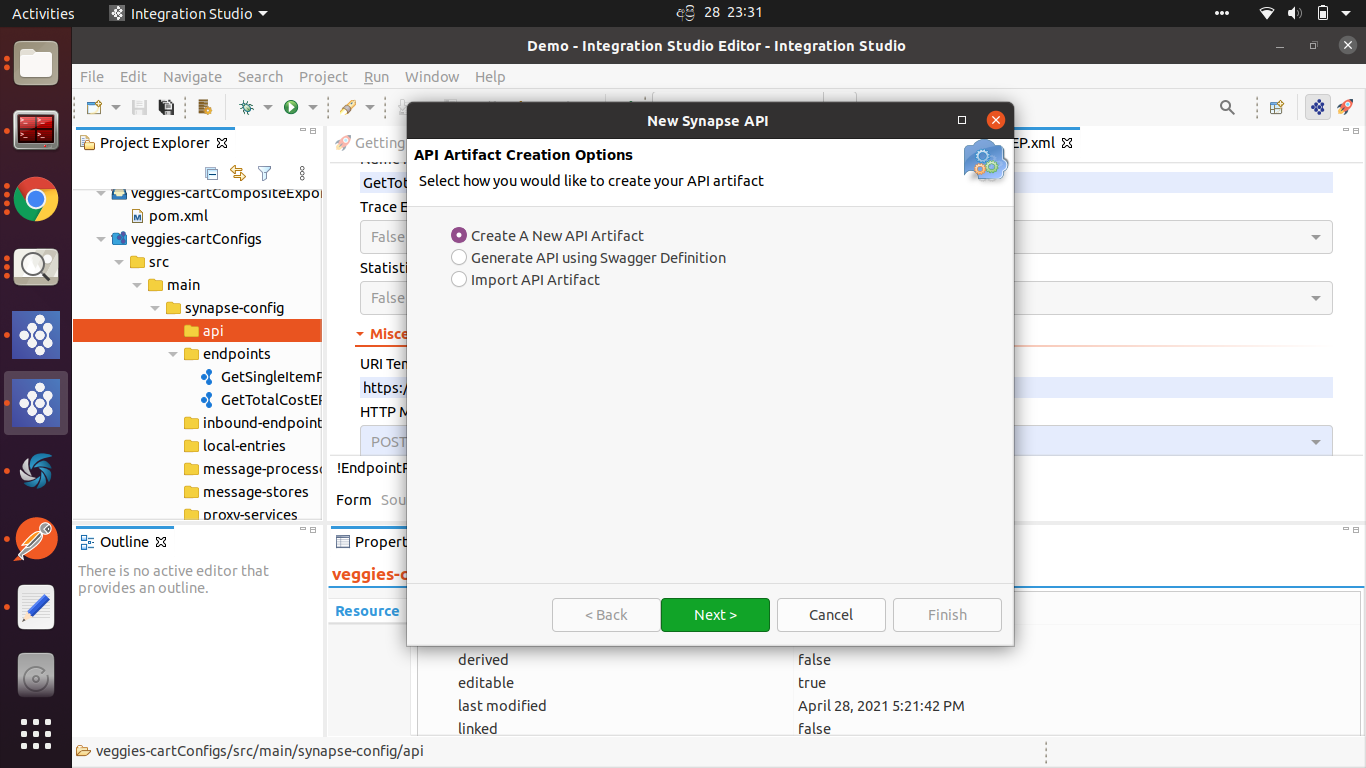
6. Create the API.
Right Click on the api -> New -> REST API.
Follow the below screens.
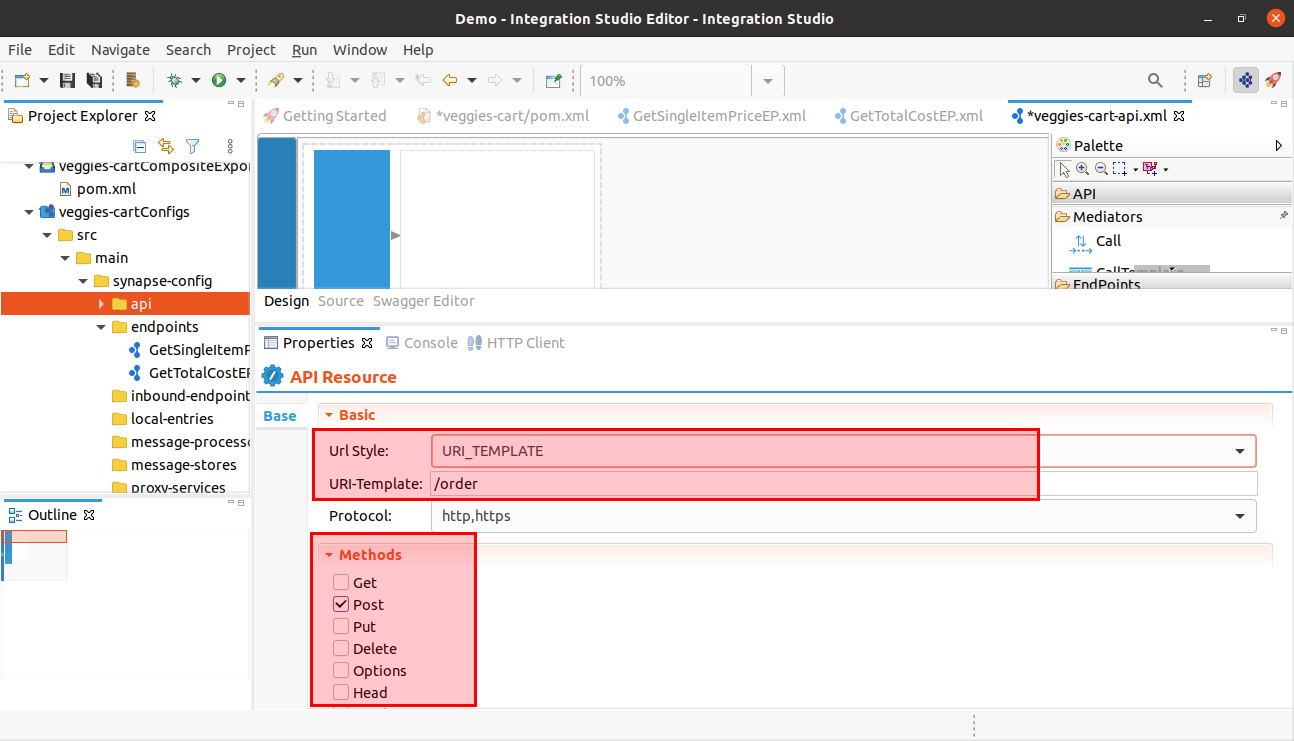
To define the URL Style, double click on the Resource and enter the details under the below screen.
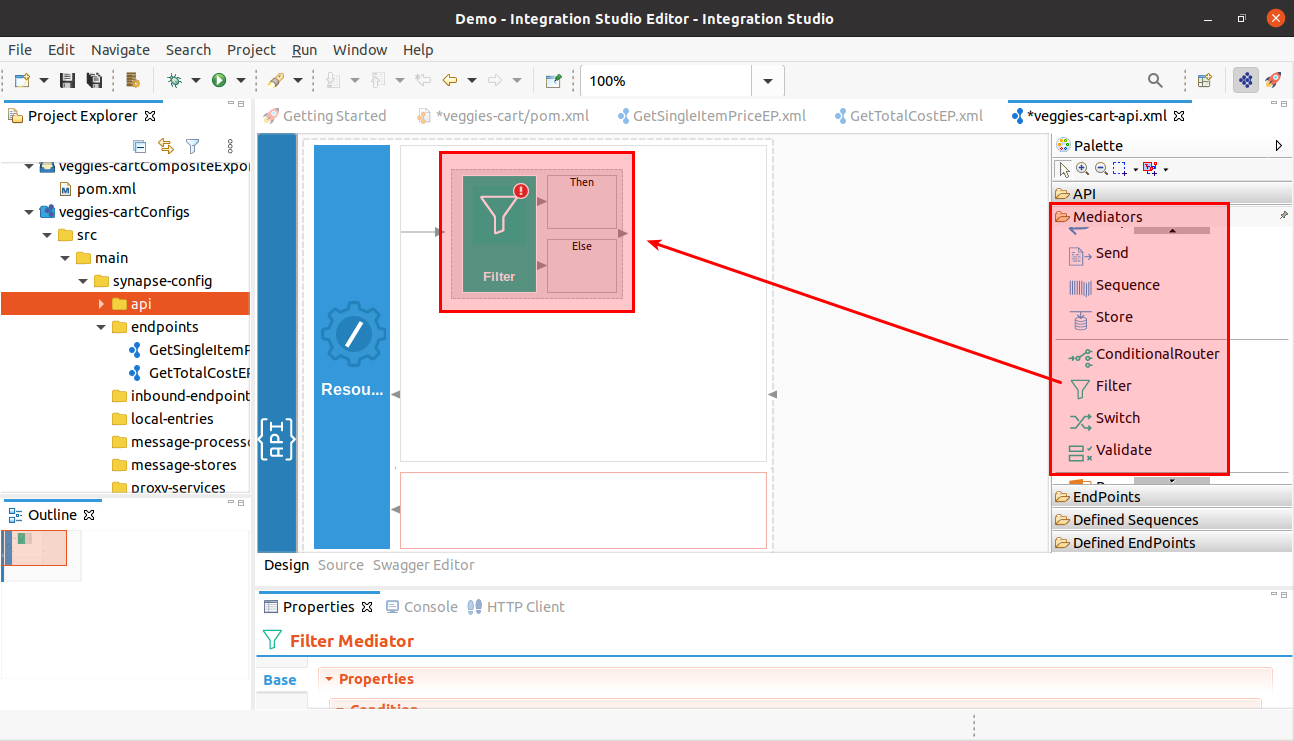
Using the Drag and Drop option add Filter Mediator to the Integration Flow. Filter mediator is used to filter out the non empty shopping cart items.
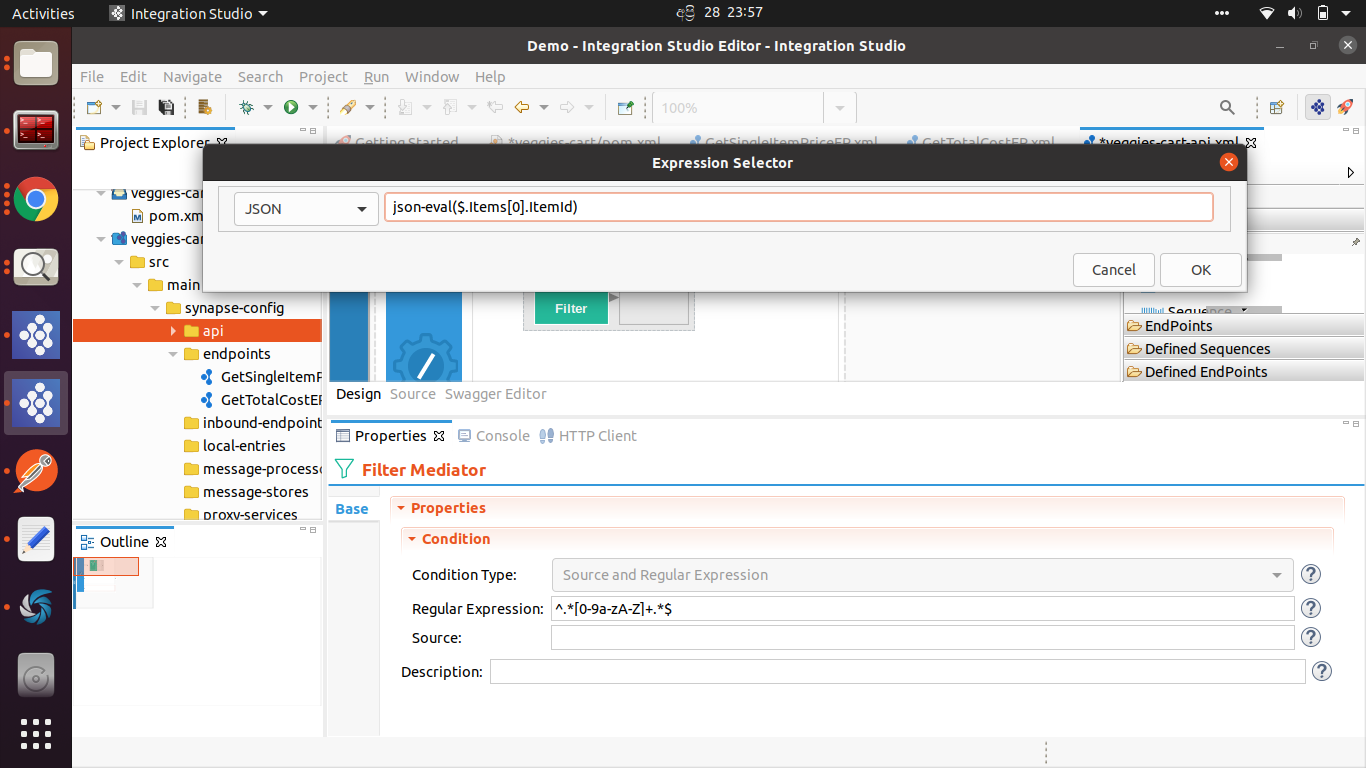
When clicking on Source, add the following details to the popped-up window.
Click ok. The logics of “Then” and “else” of the filter are configured in separate sequences. For that, sequence mediators are added.
Add GetSingleItemCostSeq and GetAllItemsCostSeq sequences to Then logic and EmptyRequestSeq sequence to else logic.


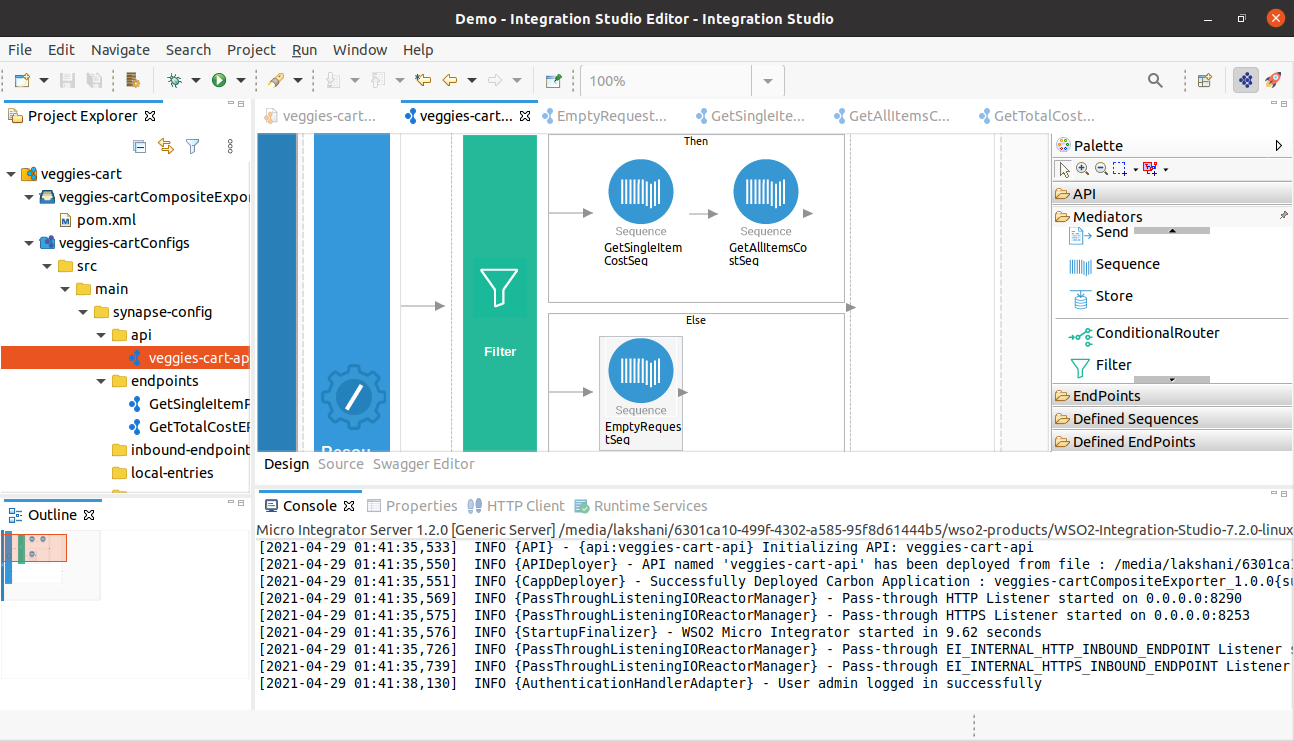
7. Deploy the solution to In-Build Micro Integrator of Integration Studio.
Navigate to compositeExporter project and click on pom.xml.
Select the artifacts that you want to deploy in WSO2 MI.

Save it.
Right click on pom.xml and Run As > Run on micro integrator.
Then you can see the server starting logs in the console tab of Integration Studio.
8. Start wso2 API Manager
9. Implement the secured API
i. Create and publish the API
Login to publisher portal https://localhost:9443/publisher with the credentials of admin/admin
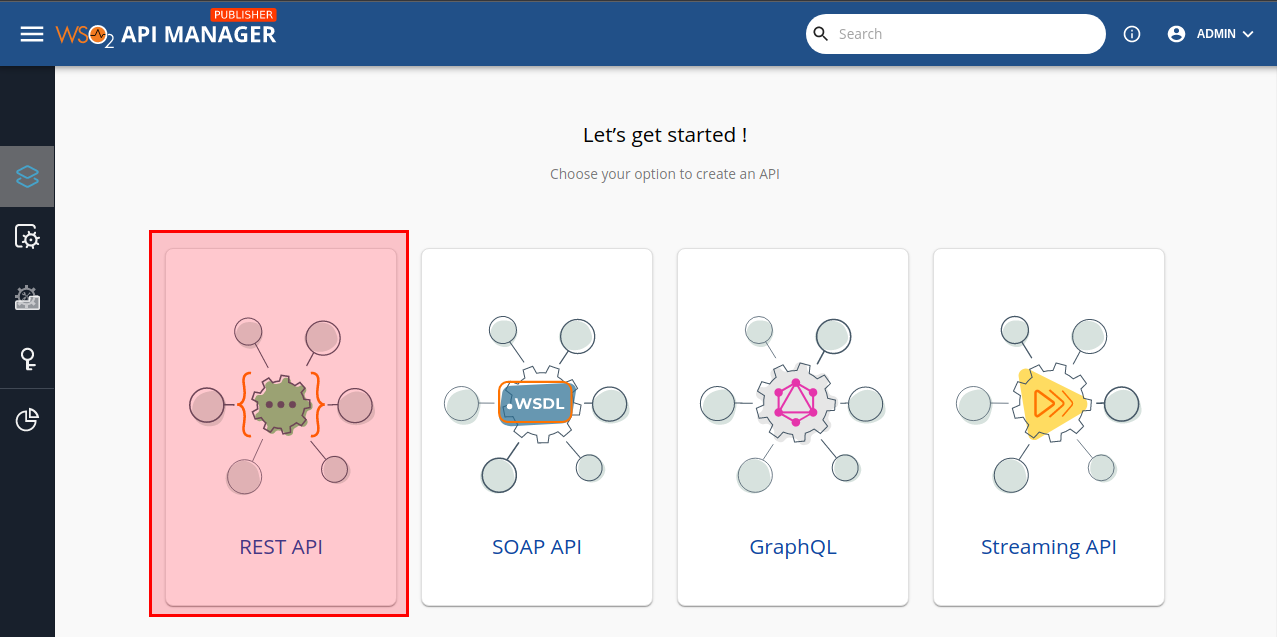
ii. Click on REST API.
Click on “Start from Scratch”
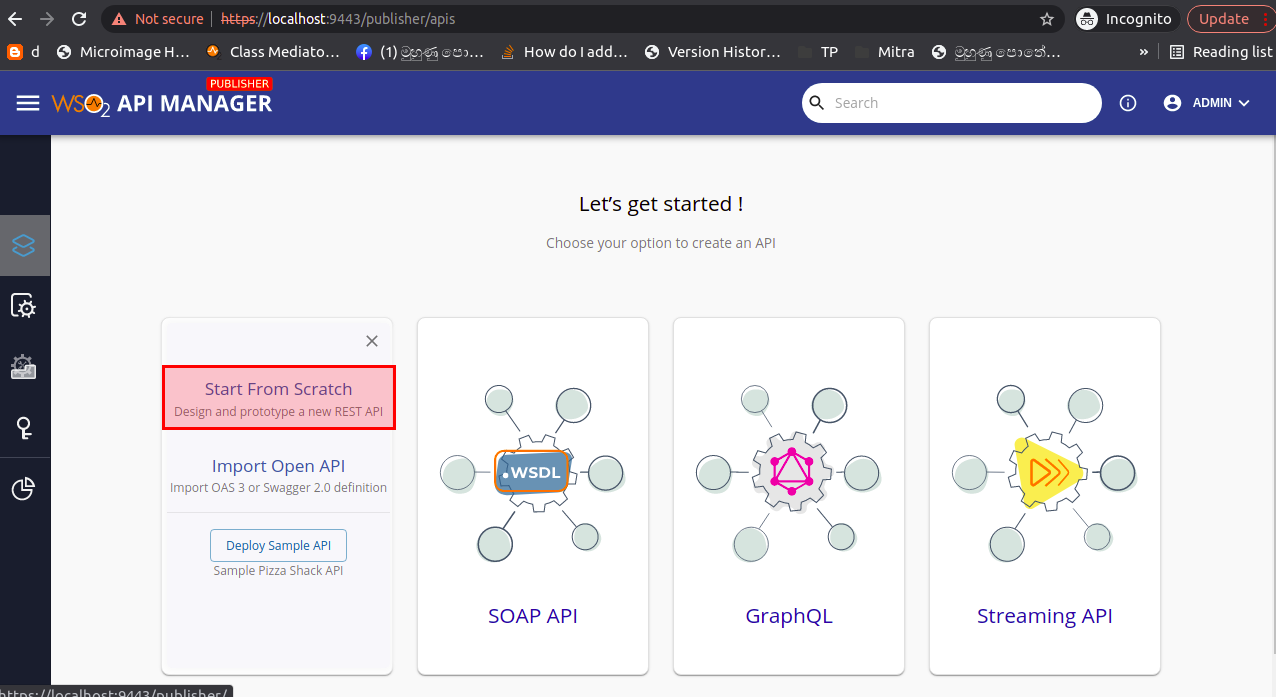
.
Create the API with below data.
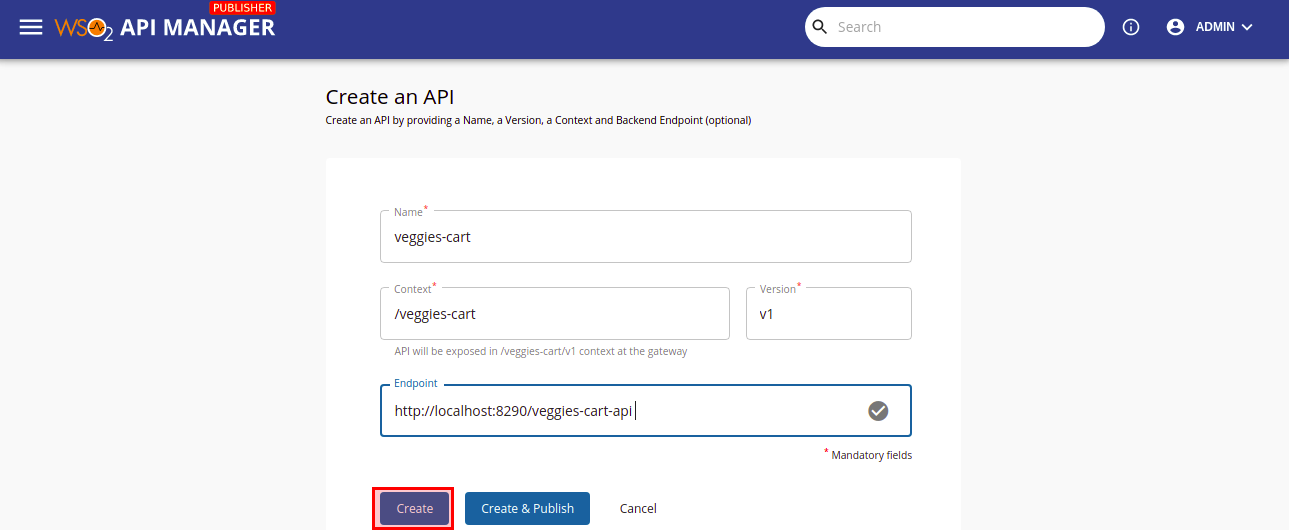
Click on the Create button.
iii. Add Resources to the API.
Go to API Configurations menu then click on Resources.
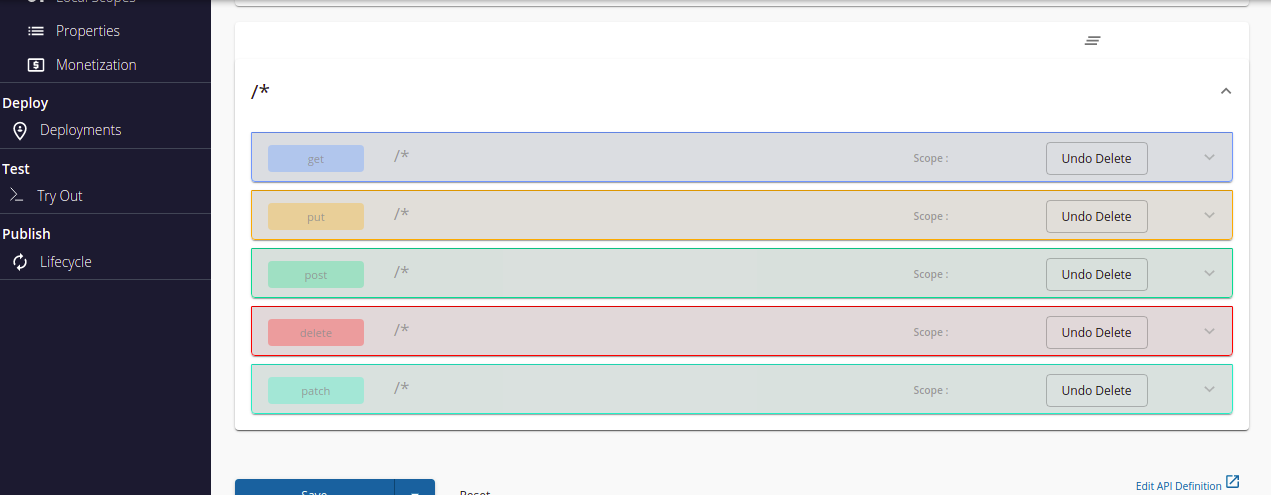
Delete the default resources from the API.

Then, add a new API resource for the implemented MI resource( POST /order)
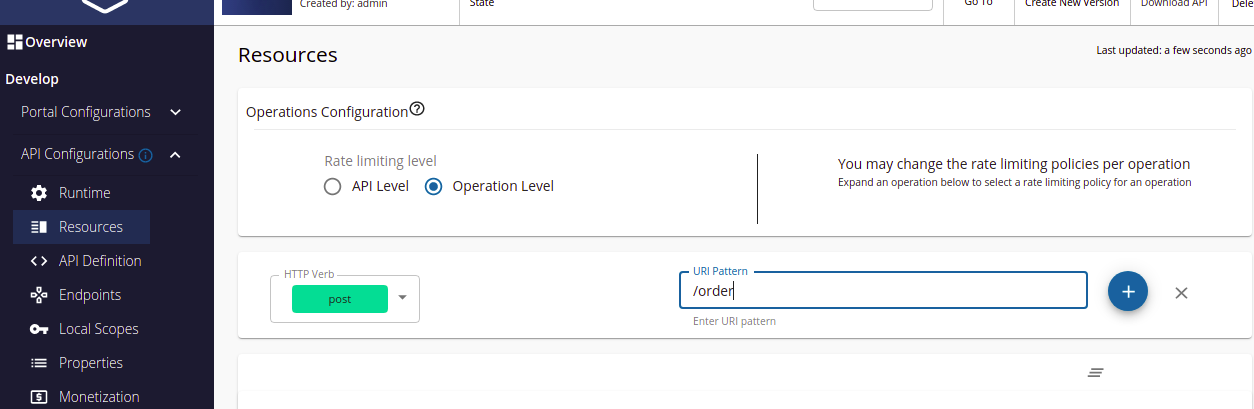
Then click on “+” button.
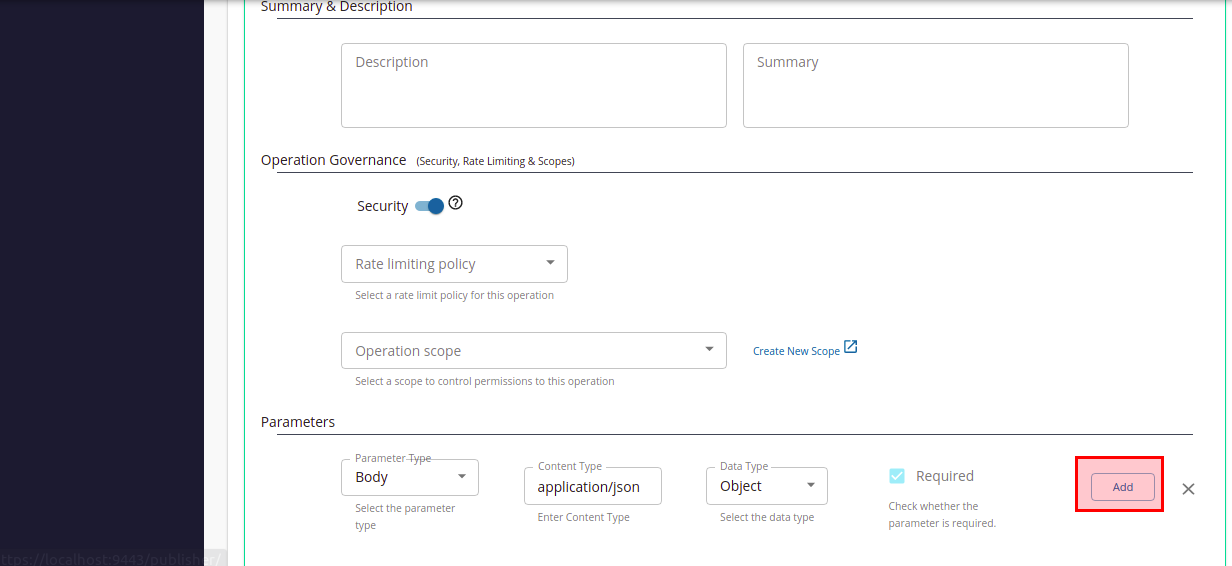
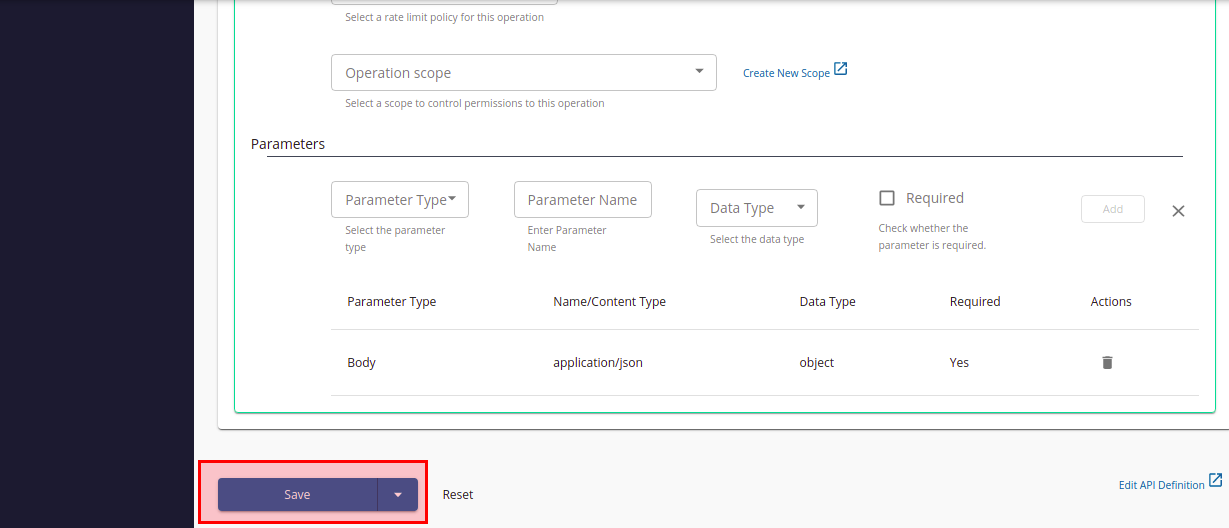
Then, click on the “/order” resource. Then you can add parameters to the resource.
As we have a post resource, we can add Body as a parameter to the API. Then click on Add button.
Then click on Save button to save the API.
iv.Deploy the API to the gateway.
Go to Deploy menu and then click on Deployment.
Then select the gateway that you want to deploy the API, next click on Deploy button.

Then you will redirect to below page.
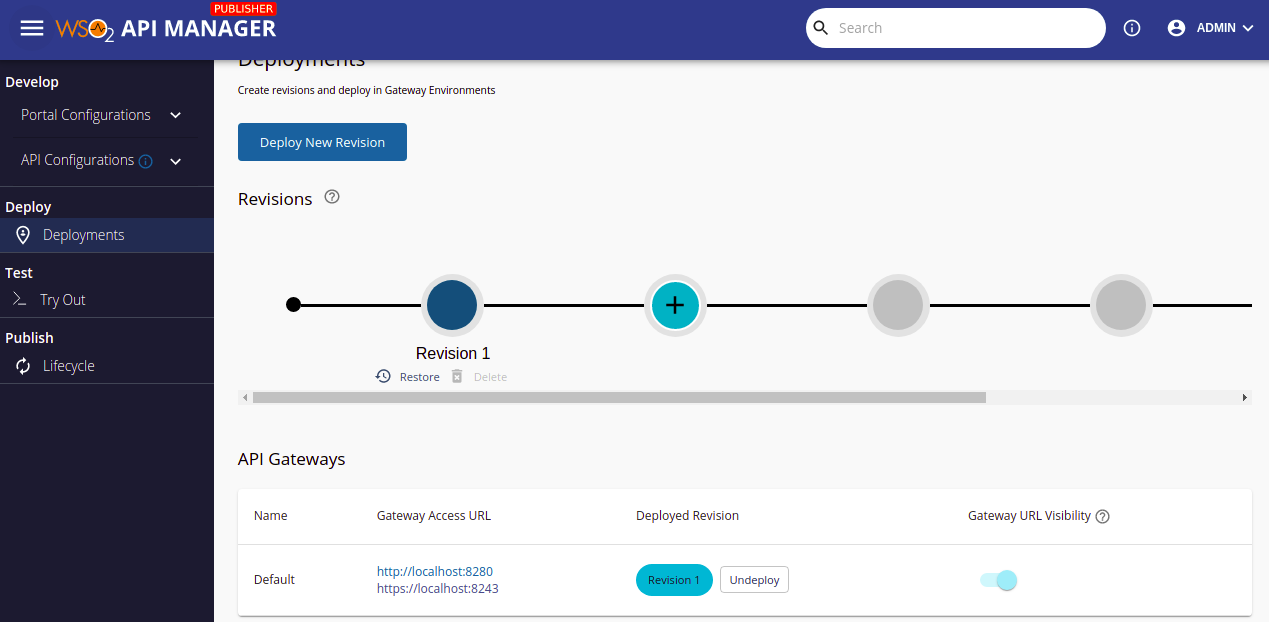
Now API is deployed to the gateway from the “revision 1”.
v. Publish API.
Go to the Publish Lifecycle menu. Then click on the Publish button.
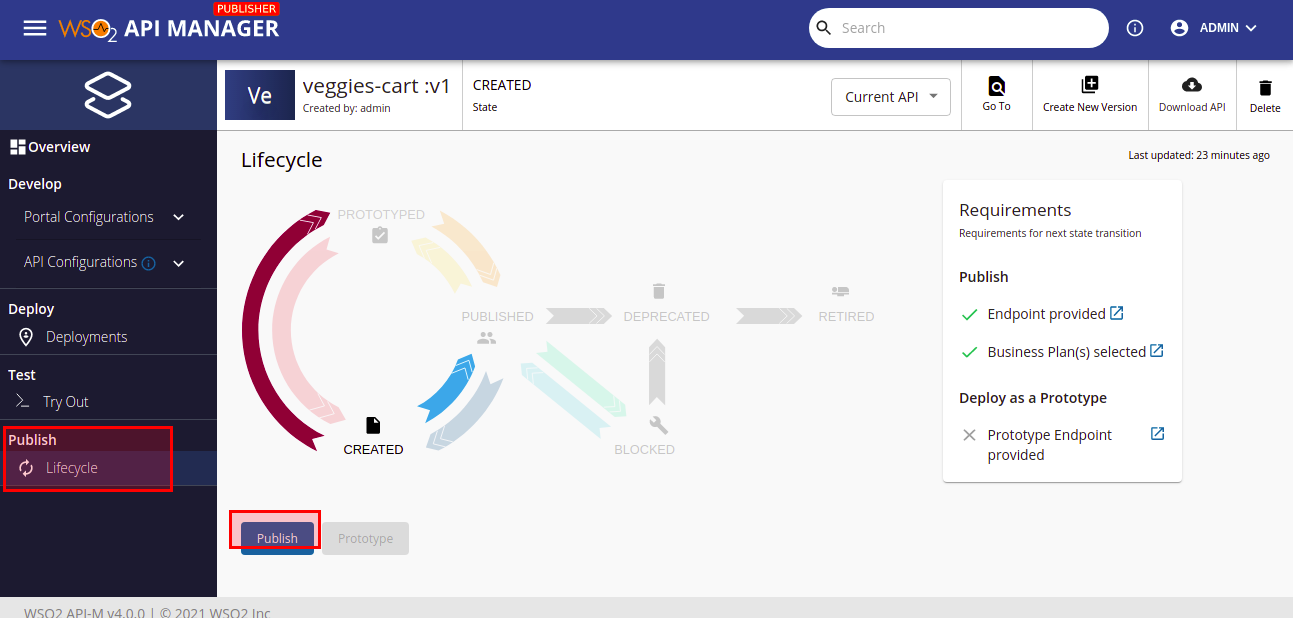
Then, API will be published to the dev portal successfully.
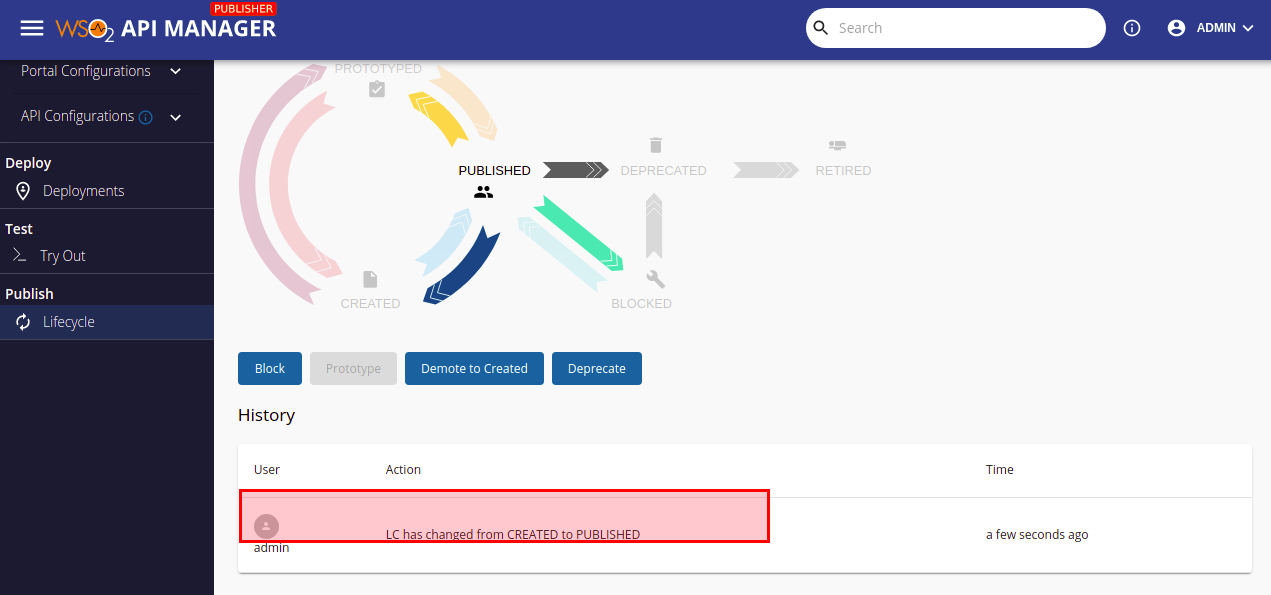
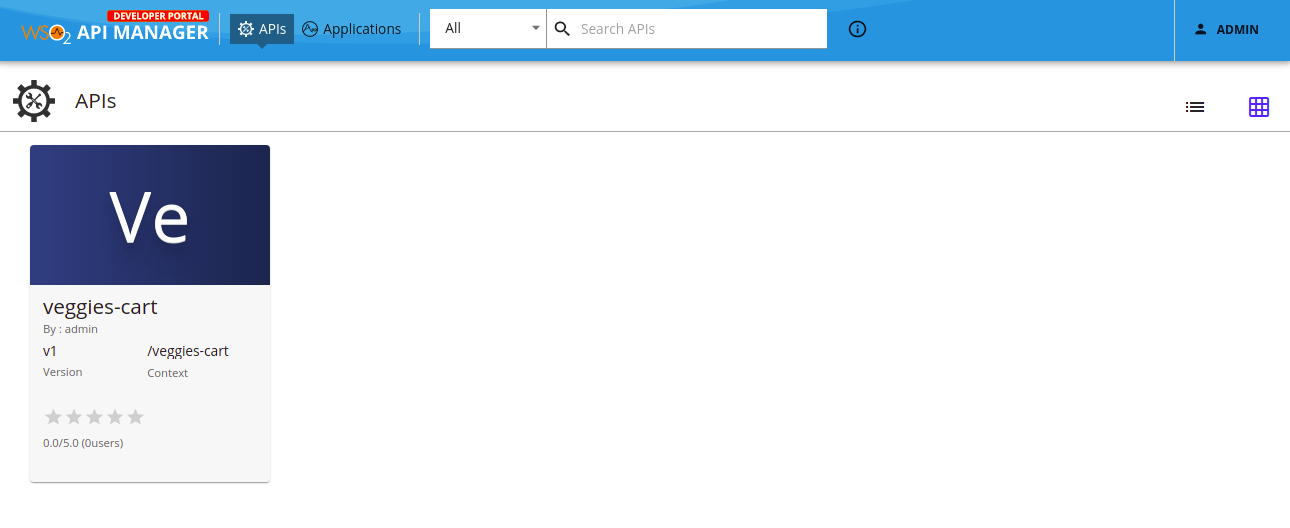
Now the API can see the API from the dev portal.
10. Subscribe to the API
i. Login to Devportal https://localhost:9443/devportal using admin/admin default credentials.
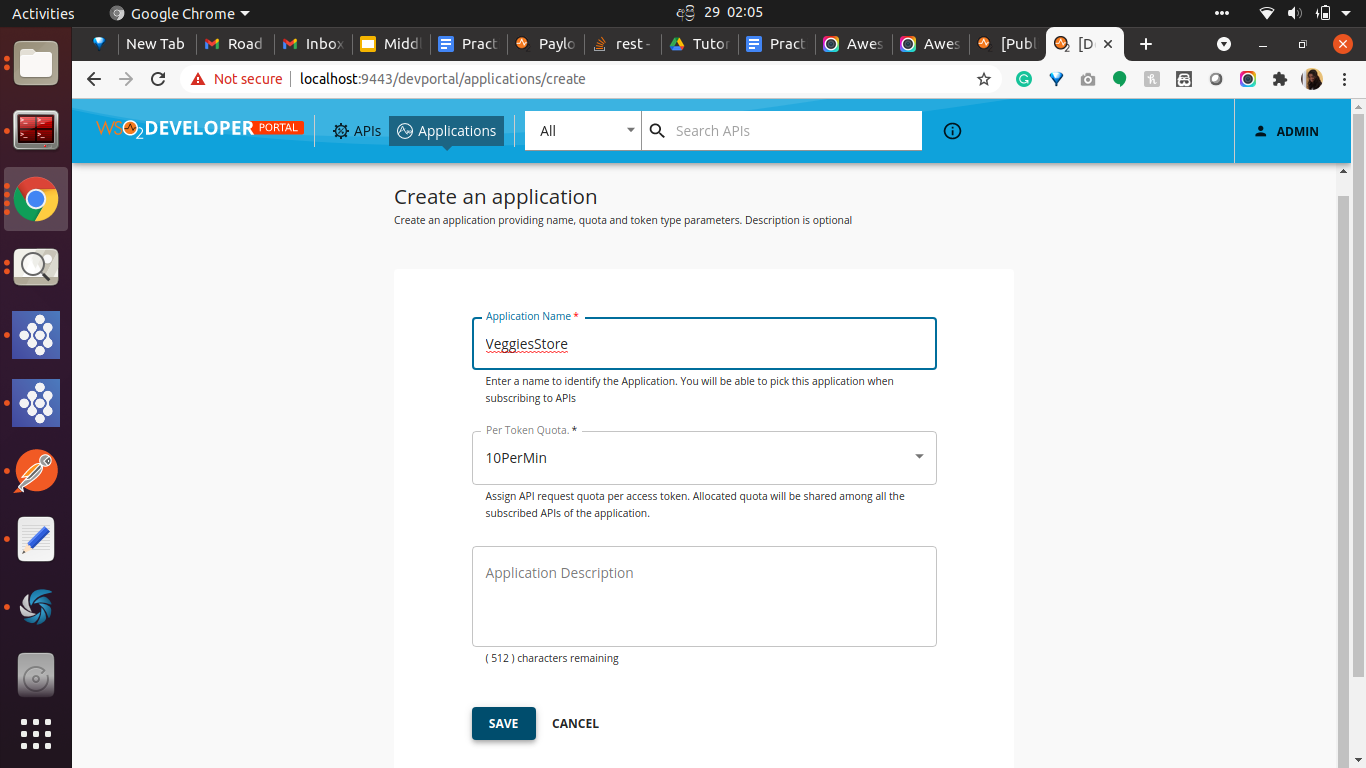
ii. Create an Application to subscribe to the API. Go to the Application menu and click on Add new application button.
Create the application.
Click on the Save button.
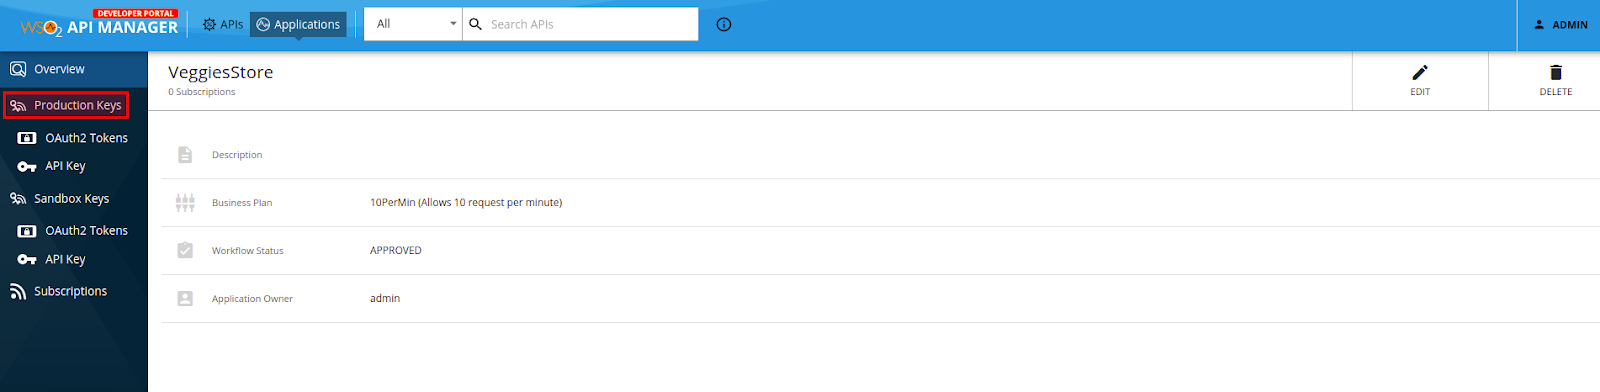
Application has been created successfully.
iv. Generate the production keys for the application.

Go to production keys menu and click on “Generate Keys”

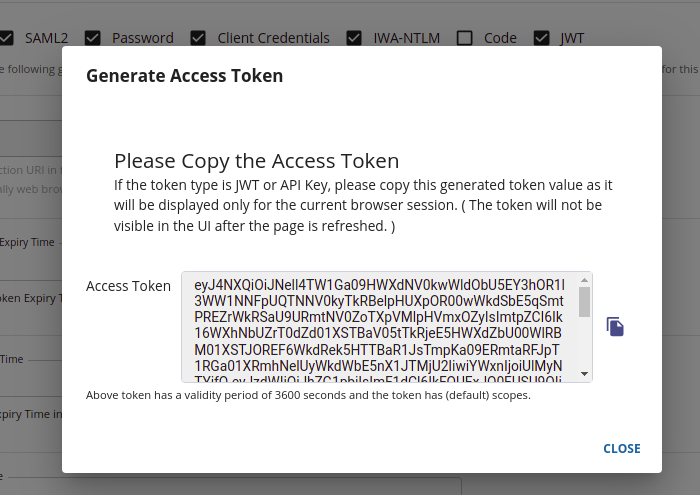
Get the Access Token.
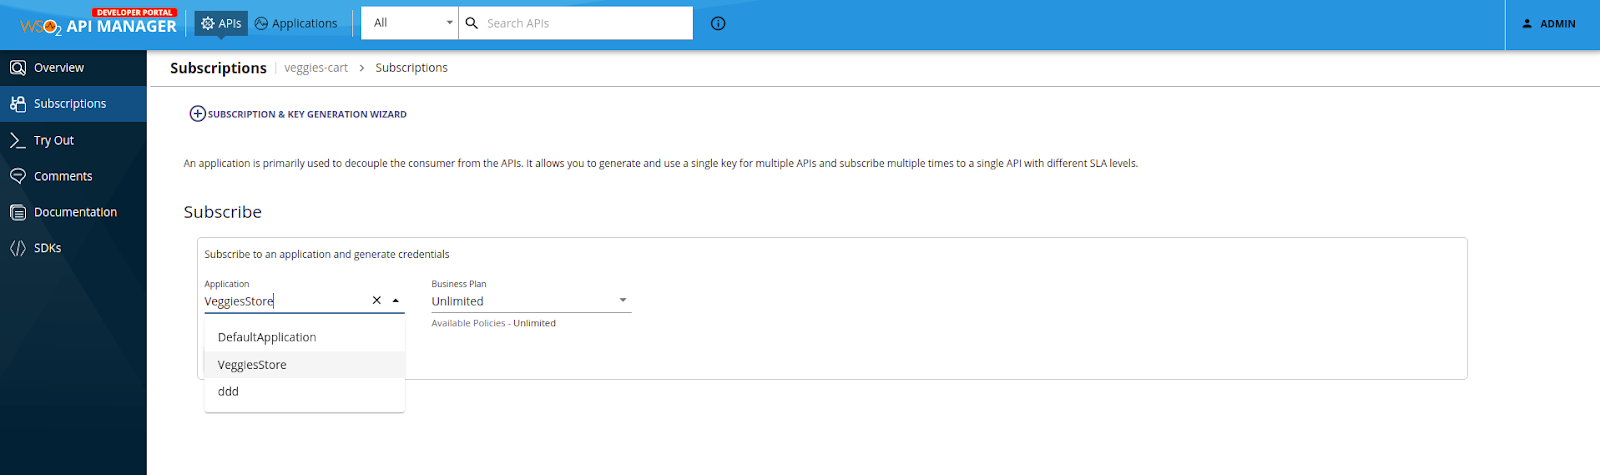
v. Subscribe to the API using the above created application.
Go to the API tab and click the VeggiesCart API. Then go to the Subscriptions tab. Select the Application and Throttling policy and click on subscribe button
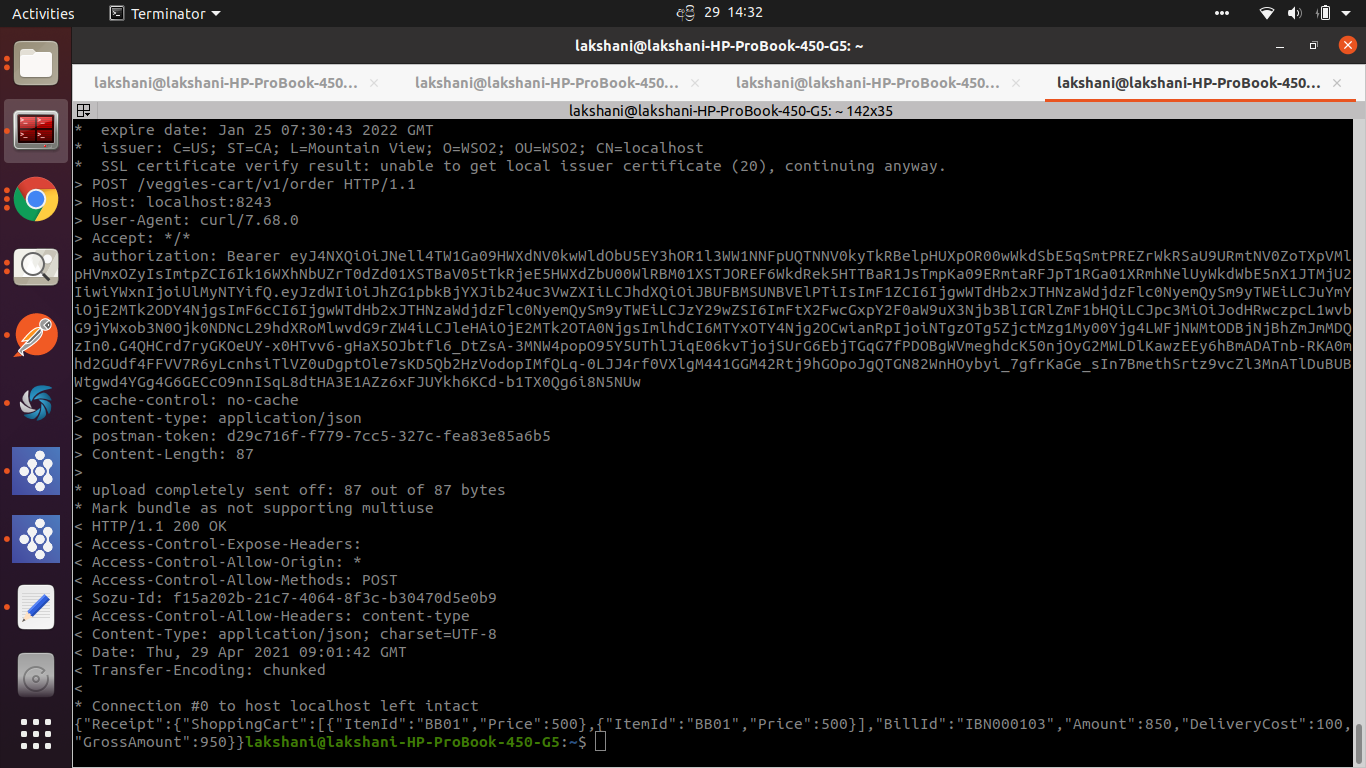
11. Try the secured API from Curl Command.
i.Execute API with non empty payload
curl -X POST \
https://localhost:8243/veggies-cart/v1/order \
-H 'authorization: Bearer eyJ4NXQiOiJNell4TW1Ga09HWXdNV0kwWldObU5EY3hOR1l3WW1NNFpUQTNNV0kyTkRBelpHUXpOR00wWkdSbE5qSmtPREZrWkRSaU9URmtNV0ZoTXpVMlpHVmxOZyIsImtpZCI6Ik16WXhNbUZrT0dZd01XSTBaV05tTkRjeE5HWXdZbU00WlRBM01XSTJOREF6WkdRek5HTTBaR1JsTmpKa09ERmtaRFJpT1RGa01XRmhNelUyWkdWbE5nX1JTMjU2IiwiYWxnIjoiUlMyNTYifQ.eyJzdWIiOiJhZG1pbkBjYXJib24uc3VwZXIiLCJhdXQiOiJBUFBMSUNBVElPTiIsImF1ZCI6IjgwWTdHb2xJTHNzaWdjdzFlc0NyemQySm9yTWEiLCJuYmYiOjE2MTk2ODY4NjgsImF6cCI6IjgwWTdHb2xJTHNzaWdjdzFlc0NyemQySm9yTWEiLCJzY29wZSI6ImFtX2FwcGxpY2F0aW9uX3Njb3BlIGRlZmF1bHQiLCJpc3MiOiJodHRwczpcL1wvbG9jYWxob3N0Ojk0NDNcL29hdXRoMlwvdG9rZW4iLCJleHAiOjE2MTk2OTA0NjgsImlhdCI6MTYxOTY4Njg2OCwianRpIjoiNTgzOTg5ZjctMzg1My00Yjg4LWFjNWMtODBjNjBhZmJmMDQzIn0.G4QHCrd7ryGKOeUY-x0HTvv6-gHaX5OJbtfl6_DtZsA-3MNW4popO95Y5UThlJiqE06kvTjojSUrG6EbjTGqG7fPDOBgWVmeghdcK50njOyG2MWLDlKawzEEy6hBmADATnb-RKA0mhd2GUdf4FFVV7R6yLcnhsiTlVZ0uDgptOle7sKD5Qb2HzVodopIMfQLq-0LJJ4rf0VXlgM441GGM42Rtj9hGOpoJgQTGN82WnHOybyi_7gfrKaGe_sIn7BmethSrtz9vcZl3MnATlDuBUBWtgwd4YGg4G6GECcO9nnISqL8dtHA3E1AZz6xFJUYkh6KCd-b1TX0Qg6i8N5NUw' \
-H 'cache-control: no-cache' \
-H 'content-type: application/json' \
-H 'postman-token: d29c716f-f779-7cc5-327c-fea83e85a6b5' \
-d ' { "Items" : [ {"ItemId" : "BB001","Quantity": 5},{"ItemId" : "BB002","Quantity": 10}]}